Tuesday, April 29, 2025

Mounting a KCS PowerPC board emulated PC hard-drive partition in AmigaOS (or: an exercise in writing a simple AmigaOS device driver)


In my previous two blog posts, I have shown that my Amiga 4000 has the ability to run multiple operating systems -- in addition to AmigaOS, it can also run Linux and NetBSD, albeit with some challenges.

Something that these three operating systems have in common is that their file system capabilities are very powerful -- they are flexible enough to support many kinds of file systems through custom modules.

For example, both Linux and NetBSD have an Amiga Fast Filesystem module making it possible for me to conveniently exchange data with my Amiga partition. The opposite scenario is also possible -- there are custom file system handlers available for AmigaOS allowing me to exchange data with my Linux Ext2 and NetBSD Berkey Fast Filesystem partitions.

The ability to exchange files with different operating systems is not a new experience to me. When my Amiga 500 was still mainstream, I was already accustomed to working with PC floppy disks. Amiga Workbench 2.0 bundles a file system driver: CrossDOS that makes it possible to exchange data with PC floppy disks.

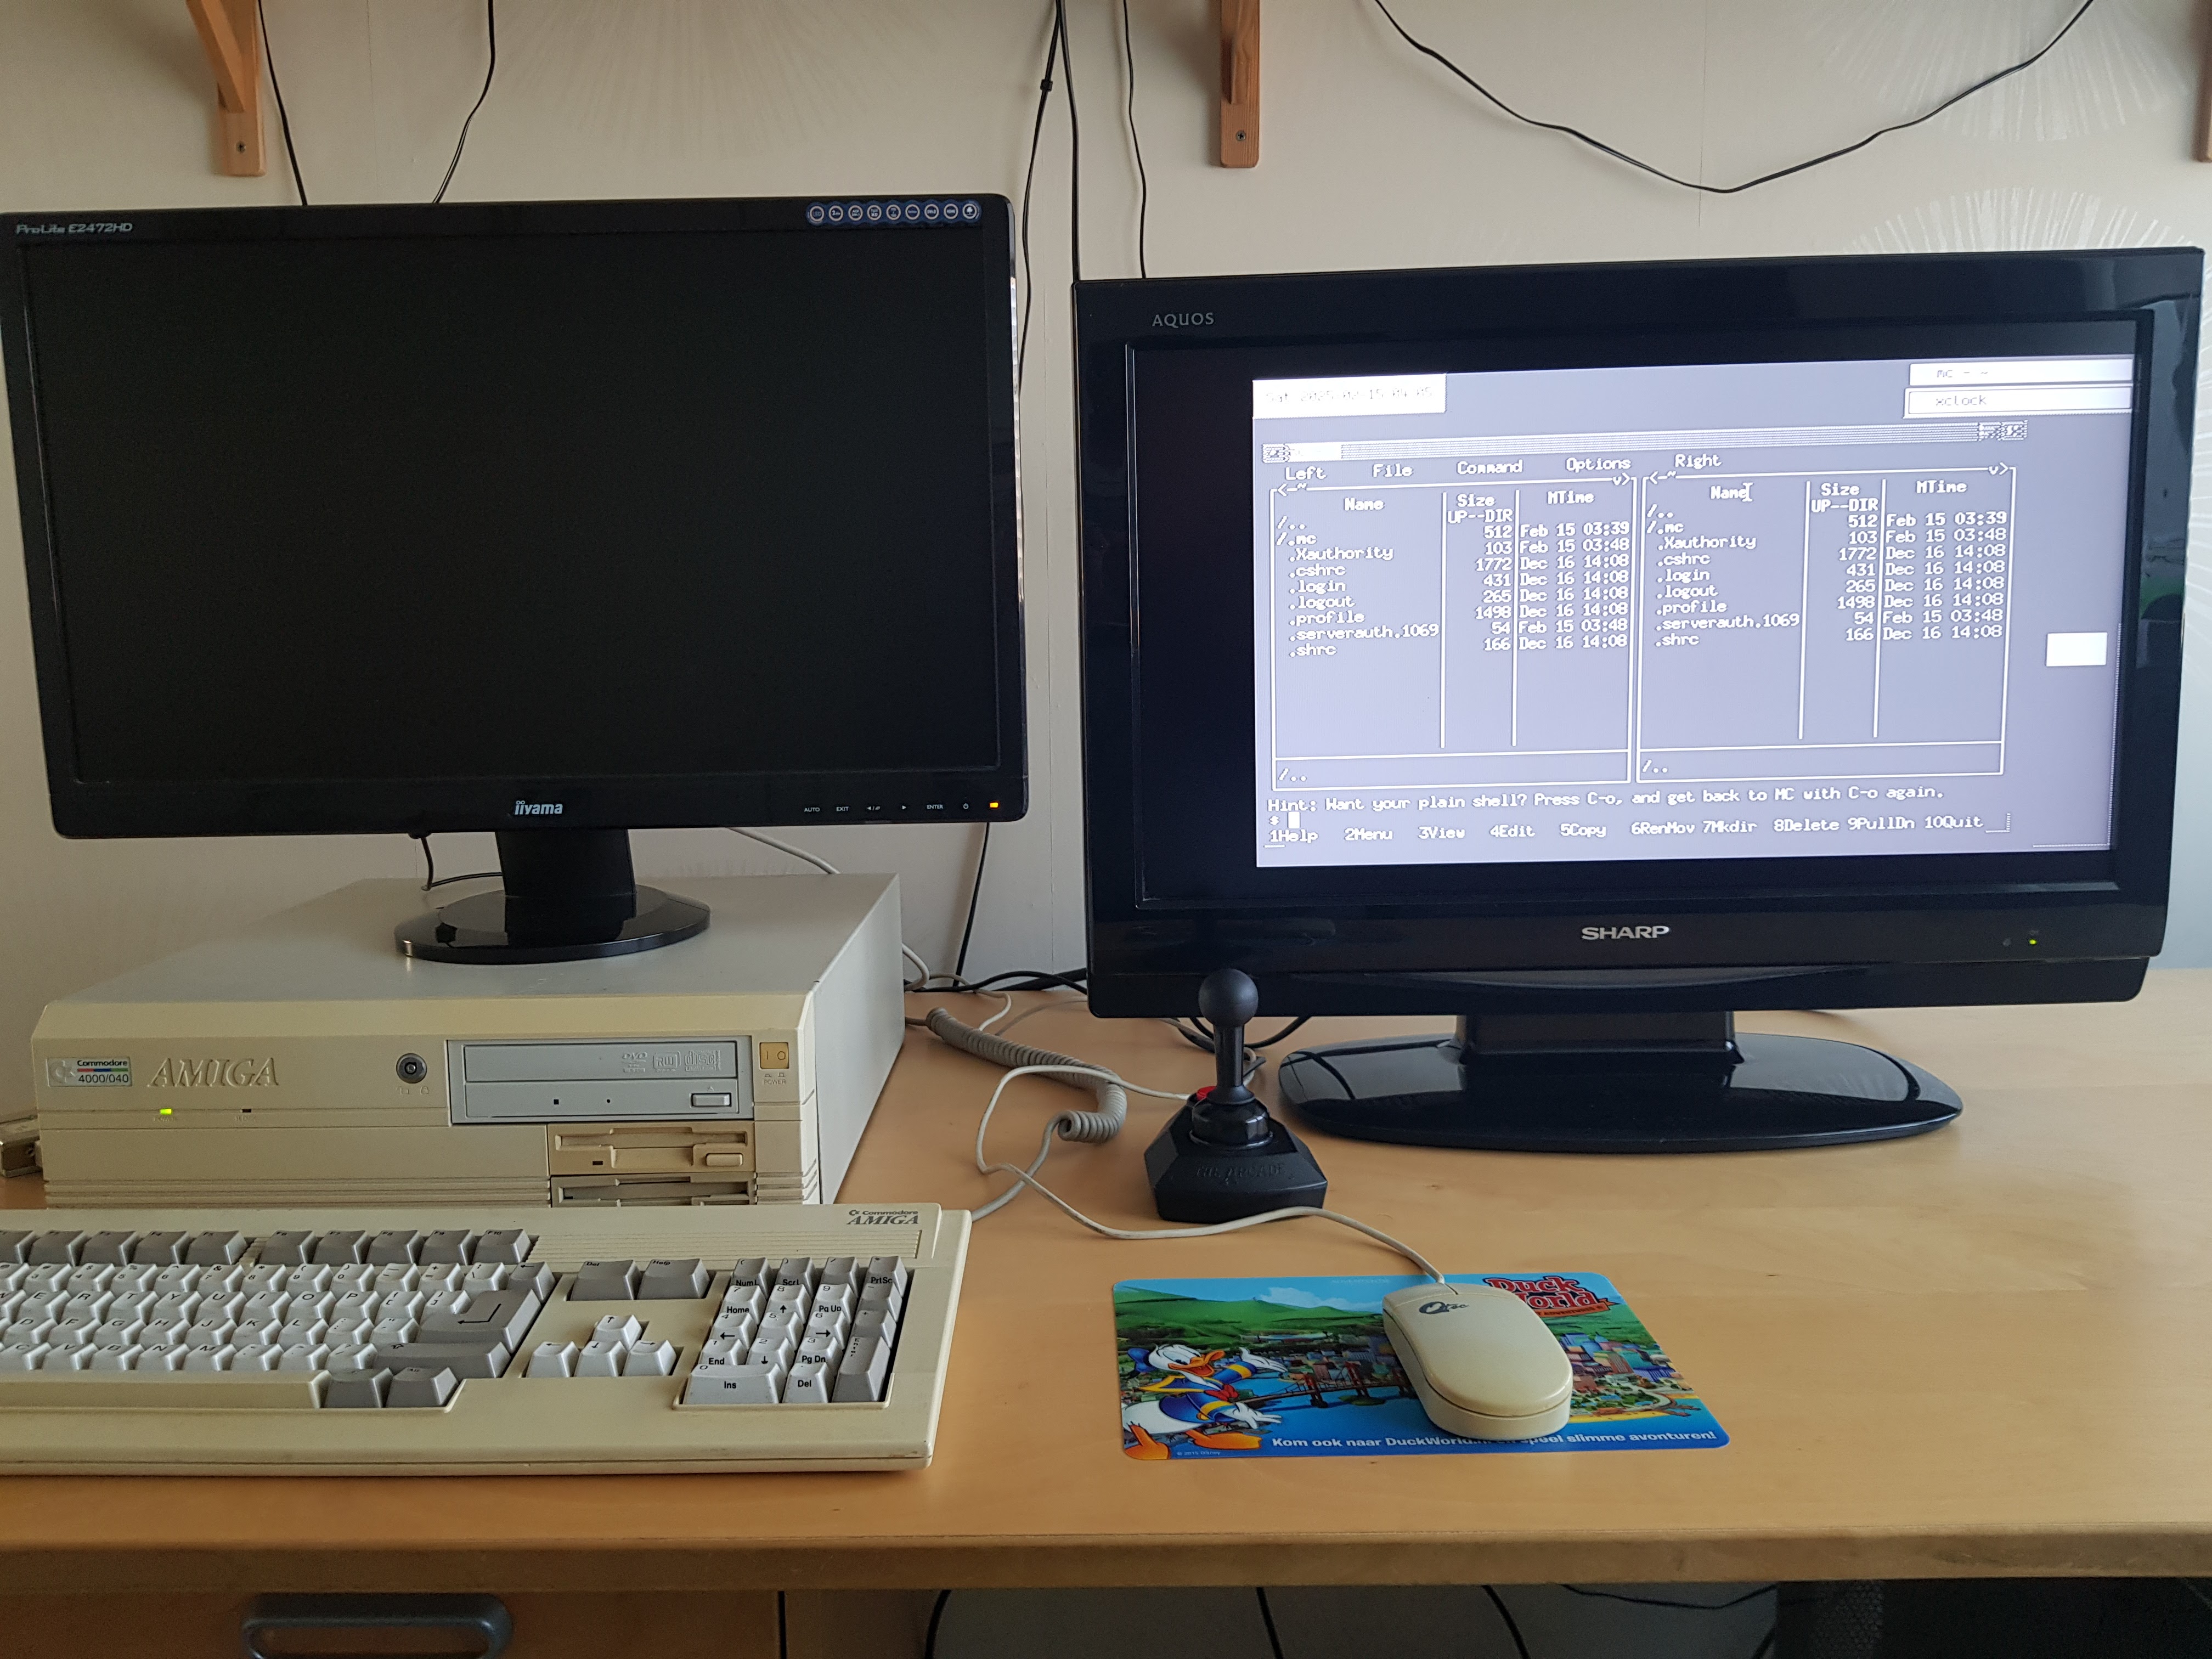
Although exchanging data with PC floppy disks is possible, there was something that I have been puzzled by for a long time. My Amiga 500 contains a KCS PowerPC board making it possible to emulate an XT-based PC. The user experience is shown in the picture on the top right. The KCS PowerPC board integrates with all kinds of Amiga peripherals, such as its keyboard, mouse, floppy drive, and hard drive (attached to an expansion board).

Unfortunately, I have never been able to exchange files with my emulated PC hard-drive from AmigaOS. Already in the mid 90s, I knew that this should be possible somehow. I have dedicated a great amount of effort in configuring a mount entry for my hard drive, but despite all my efforts I could not make it work. As a result, I had to rely on floppy disks or a null modem cable to exchange data, making data exchange very slow and inconvenient.

Recently, I have decided to revisit this very old problem. It turns out that the problem is simple, but the solution is a bit more complicated than I thought.

In this blog post, I will explain the problem, describe my solution and demonstrate how it works.

The KCS PowerPC board


As I have already explained in a previous blog post, the KCS PowerPC board is an extension card for the Amiga. In an Amiga 500, it can be installed as a trapdoor expansion.

It is not a full emulator, but it offers a number of additional hardware features making it possible to run PC software:

  • A 10 MHz NEC V30 CPU that is pin and instruction-compatible with an Intel 8086/8088 CPU. Moreover, it implements some 80186 instructions, some of its own instructions, and is between 10-30% faster.
  • 1 MiB of RAM that can be used by the NEC V30 CPU for conventional and upper memory. In addition, the board's memory can also be used by the Amiga as additional chip RAM, fast RAM and as a RAM disk.
  • A clock (powered by a battery) so that you do not have reconfigure the date and time on startup. This PC clock can also be used in Amiga mode.

The KCS PowerPC board integrates with all kinds of Amiga peripherals, such as the keyboard, mouse, RAM, joysticks, floppy drives and hard drives (provided by an expansion board).

It can also emulate various kinds of displays controllers, such as CGA, EGA and VGA, various kinds of graphics modes, and Soundblaster and Adlib audio.

Video and audio is completely emulated by using Amiga's own chips and software. Because of the substantial differences between PC graphics controllers and the Amiga chips, graphics emulation is often quite slow.

Although graphics are quite costly to emulate, text mode applications generally work quite well and sometimes even better than a real XT PC. Fortunately, many PC applications in the 80s and early 90s were text based, so this was, aside for games, not a big issue.

Configuring DOS drivers in AmigaOS


AmigaOS has the ability to configure custom DOS drivers. Already in the 90s, I discovered how this process works.

In Amiga Workbench 2.0 or newer, DOS driver configurations can be found in the DEVS:DOSDrivers folder. For example, if I open this folder in the Workbench then I can see configurations for a variety of devices:


(As a sidenote: in Amiga Workbench 1.3 and older, we can configure DOS drivers in a centralized configuration file: DEVS:MountList).

In the above screenshot, the PC0 and PC1 configurations refer to devices that can be used to exchange data with PC floppy disks. When a PC floppy disk is inserted into the primary or secondary disk drive, the PC0: or PC1: devices provide access to its contents (rather than the standard DF0: or DF1:).

I eventually figured out that these DOS driver entries are textual configuration files -- I could, for example, use the PC0: configuration as a template for creating a configuration to mount my hard drive partition (PCDH0:). If I open this configuration file in a text editor, then I see the following settings:

FileSystem     = L:CrossDOSFileSystem
Device         = mfm.device
Unit           = 0
Flags          = 1
Surfaces       = 2
BlocksPerTrack = 9
Reserved       = 1
Interleave     = 0
LowCyl         = 0
HighCyl        = 79
Buffers        = 5
BufMemType     = 0
StackSize      = 600
Priority       = 5
GlobVec        = -1
DosType        = 0x4D534400

With my very limited knowledge in the 90s, I was already able to determine that if I want to open my hard drive partition, some settings need to be changed:

  • CrossDOSFileSystem is a filesystem driver that understands MS-DOS FAT file systems and makes them accessible through AmigaDOS function calls. This setting should remain unchanged.
  • The device driver: mfm.device is used to carry out I/O operations on a floppy drive. Many years later, I learned that MFM means Modified frequency modulation, a common method for encoding data on floppy disks.

    To be able to access my SCSI hard drive, I need to replace this device driver with a device driver can carry out I/O operations for my hard drive: evolution.scsi. This device file is available from the ROM thanks to the autoconfig facility of my expansion board: the MacroSystem Evolution.
  • The geometry of the hard drive is different than a floppy drive -- for example, it offers much more storage and the PC partition is typically somewhere in the middle of the hard drive, not at the beginning. Aside from the fact that I knew that the LowCyl and HighCyl settings can be used to specify the boundaries of a partition, I knew that I had to change other configuration properties as well. In the 90s, I had no idea what most of them were supposed to mean, but I was able to determine them by using a utility program: SysInfo.

Fast forwarding many years later, I learned that it is a common habit to measure offsets and sizes of classic storage media in cylinders, heads and sectors. The following picture (taken from Wikipedia) provides a good overview of the concepts:


By requesting the properties of my KCS: partition (the Amiga partition storing the data of my emulated PC drive) in SysInfo, I am able to derive most of the properties that I need to adjust my configuration:


Some of the above properties can be translated to DOS driver configuration properties as follows:

  • Unit number translates to: Unit
  • Device name translates to: Device
  • Surfaces translates to: Surfaces
  • Sectors per side translates to: BlocksPerTrack. I must admit that I find the term: "sectors per side" a bit confusing so I am not quite sure how it relates to concepts in the picture shown earlier, Anyway, I discovered by experimentation that this metric is equal to blocks per track setting.
  • Reserved blocks translates to Reserved.
  • Lowest cylinder translates to LowCyl.
  • Highest cylinder translates to HighCyl.
  • Number of buffers translates to Buffers.

Some DOS driver configurations also need to know the Mask and MaxTransfer properties of a hard-drive partition. I can discover these settings by using HDToolBox and selecting the following option: Advanced options -> Change File System for Partition:


Finally, to be able to know how to address the offsets in sizes in bytes, I need to know the block size. On the Amiga, 512 is a common value.

If I take the discovered properties into account and make the required changes, I will get the following DOS driver configuration for my hard drive partition (PCDH0:):

FileSystem     = L:CrossDOSFileSystem
Device         = evolution.device
Unit           = 0
Flags          = 1
Surfaces       = 1
BlocksPerTrack = 544
Reserved       = 2
Interleave     = 0
LowCyl         = 376
HighCyl        = 750
Buffers        = 130
BufMemType     = 0
StackSize      = 600
Priority       = 5
GlobVec        = -1
DosType        = 0x4D534400
Mask           = 0xffffff
MaxTransfer    = 0xfffffe
BlockSize      = 512

Although the configuration looks complete, it does not work -- if I try to mount the PCDH0: device and list its contents, then I will see the following error message:


This is as far as I could get in the 1990s. Eventually, I gave up trying because I had no additional resources to investigate this problem.

A deeper dive into the issue


Fast forwarding many years later, there is much I have learned.

Foremost, I learned a couple of things about PC hard drives -- I now know that the first block of every PC hard-drive (consisting of 512 bytes) contains a Master Boot Record (MBR).

A master boot record contains various kinds of data, such as bootstrap code (a prerequisite to boot an operating system from a hard drive partition), a partition table and a fixed signature (the last two bytes) that are supposed to always contain the values: 0x55, 0xAA.

With my SCSI2SD replacement for my physical hard drive, I can easily check the raw contents of the partitions by putting the SD card in the card reader of my Linux PC and inspecting it with a hex editor.

In addition, I found a nice hex editor for the Amiga: AZap, that can also be used to inspect the raw data stored on an AmigaDOS drive. For example, if I open a CLI and run the following command-line instruction:

AZap KCS:

Then I can inspect the raw data of my emulated PC drive (the KCS: partition):


The above screenshot shows the first block (of 512 bytes) of the KCS partition. This block corresponds to the hard drive's MBR.

If I look at its contents, I have noticed something funny. For example, the last two bytes (the typical signature) seems to be reversed -- instead of 55AA, it is AA55.

Furthermore, if I look at the bootstrap code, I see a number of somewhat human-readable strings. As an example, take the string:

"b seutirgnsssyetme"

It should probably not take long to observe what is going on -- the order of each pair of bytes is reversed. If I unreverse them, we will see the following string:

" besturingssysteem"

the word in the middle: besturingssysteem translates to: operating system (I am using a Dutch version of MS-DOS).

So why is the order of each pair of bytes reversed? I suspect that this has something to do with performance -- as I have already explained, the KCS PowerPC board integrates with a variety of Amiga peripherals, including hard-drives. To use Amiga hard drives the emulation software uses AmigaOS device drivers.

Amiga software uses the Motorola 68000 CPU (or newer variants) for executing instructions. This CPU is a big-endian CPU, while the NEC V30 CPU (pin-compatible with an Intel 8086/8088) is a little endian CPU. The order of bytes is reversed in little endian numbers. Because PCs use little-endian CPUs, data formats used on the PC, such as the MBR and the FAT file system typically store numbers in little endian format.

To let run software properly on the Motorola 68000 CPU, it needs to reverse the bytes that numbers consists of. Most likely, the emulation performs better if the byte order does not have to be reversed at runtime.

After this observation I realized that a big ingredient in solving my puzzle is to make sure that each pair of bytes gets unreversed at runtime so that a file system handler knows how to interpret the hard-drive's raw data.

Idea: developing a proxy device driver


As I have already explained, a file system handler typically uses a device driver to perform low-level I/O operations. To cope with the byte reversing problem, I came with the idea to develop a proxy driver providing the following features:

  • It relays I/O requests from the proxy driver to the actual hard-disk driver. For requests that work with hard disk data, the driver intercepts the call and reverses the bytes so that the client gets it in a format that it understands.
  • Some filesystem handlers, such as fat95, know how to auto detect partitions by inspecting a hard-drive's MBR. Unfortunately, auto detection only works if the MBR is on the first block. An emulated PC hard drive is typically never the first partition on an Amiga hard drive. The proxy driver can translate offsets in such a way that the caller can refer to the MBR at offset 0.

In a nutshell, the proxy device driver offers us a virtual PC hard drive that is accessible from AmigaOS.

A high level overview of some of the AmigaOS components


Implementing an Amiga device driver for the first time requires some learning about the concepts of the operating system. As a result, it is good to have a basic understanding of some of the components of which the operating system consists:

  • The kernel is named: Exec. It is (somewhat) a microkernel that is responsible for task management, memory allocation, interrupt handling, shared library and device management, and inter-process communication through message passing.

    Compared to more modern/common microkernel operating systems, it does message passing through pointers rather than serializing data. As a result, it is very fast and efficient, but not as secure as true microkernels.
  • One of the responsibilities of the kernel is device management -- this is done through device drivers that can be loaded from disk when they are needed, or by device drivers that are already in ROM or RAM. Device drivers use .device as a filename extension.

    From the file system, they are typically loaded from the DEVS: assignment. By default, this assignment is an alias for the Devs/ directory residing on the system partition.

    A driver is a module typically representing a shared resource, such as a physical device (e.g. a floppy drive). The functionality of a device driver can be used by client applications by sending I/O request objects using the kernel's message passing system.

    I/O requests are basically function calls that specify a command number and some data payload. A device driver may also modify the data payload to send an answer, such a block of data that was read.
  • AmigaDOS is a sub system providing file system abstractions, a process management infrastructure and a command-line interface. Due to time pressure, it was not developed from scratch but taken from another operating system called: TRIPOS under a license from MetaComCo. AmigaDOS was written in BCPL and interacting with it from the C programming language was not always very efficient. In AmigaOS 2.0, the AmigaDOS sub system was rewritten in C.
  • AmigaDOS also has its own drivers (they are often called DOS drivers rather than Exec drivers). DOS drivers can integrate with the file system operations that AmigaDOS provides making it possible work with many kinds of file systems.

    Similar to UNIX-like systems (e.g. Linux), also non-storage devices can be accessed through a sub set of file system operations. DOS drivers providing functionality for non-storage devices are typically called handlers. For example, it is possible to redirect output to the serial port (e.g. using SER: as a file output path) or opening a console window (by using CON:) through custom handlers.

    DOS drivers are typically loaded from the L: assignment, that by default, refers to the L/ folder on the system partition.
  • AmigaOS consists of more parts, such as Intuition: a windowing system and the Workbench: a graphical desktop environment. For this blog post, their details are irrelevant.

Developing a custom driver


I have plenty of C development experience, but that experience came many years after abandoning the Amiga as a mainstream platform. I gained most of my C development experience while using Linux. Back in the 90s, I had neither a C compiler at my disposal nor any C development resources.

In 2012 I learned that a distribution of the GNU toolchain and many common Linux tools exists for AmigaOS: Geek Gadgets. I have used Geek Gadgets to port the tools of my IFF file format experiments to AmigaOS. I have also used it to build a native viewer application for AmigaOS.

After some searching, I discovered a simple AmigaOS driver development example using GCC. Unfortunately, I learned that compiling this example driver with the GCC version included with the Geek Gadgets distribution does not work -- these tutorials rely on compiler extensions (for example, to implement the right calling convention and ordering of functions) that only seem to be supported by much newer versions of GCC. These tutorials recommend people to use amiga-gcc -- a cross compiling toolchain that needs to run on modern computers.

Although I can set up such a cross compilation toolchain, it is way too much complexity for my use case -- the main reason why I previously used GCC (in Geek Gadgets) is to port some of my Linux applications to AmigaOS.

Then I ended up searching for conventional resources that were commonly used when the Amiga was still a mainstream platform. The Amiga Development Reference explains quite well how to use device drivers from client applications.

Unfortunately, it does not provide much information that explains how to develop a device driver yourself -- the only information that it includes is an example driver implemented in assembly. I am not scared of a technical challenge, but for a simple driver that just needs to relay I/O requests and reverse data, assembly is overkill IMO. C is a more useful language to do that IMO.

I ended up using the SAS C Compiler (originally it was called the Lattice C compiler) version 6.58. I have managed to obtain a copy several years ago. The compiler also includes a very simple device driver example implemented in C (it resides in the example/example_device sub folder).

A device driver has a very simple structure:

int  __saveds __asm __UserDevInit(register __d0 long unit,
                                  register __a0 struct IORequest *ior,
                                  register __a6 struct MyLibrary *libbase)
{
    /* .... */
}

void __saveds __asm __UserDevCleanup(register __a0 struct IORequest *ior,
                                     register __a6 struct MyLibrary *libbase)
{
    /* .... */
}

void __saveds __asm DevBeginIO(register __a1 struct IORequest *ior)
{
    /* .... */
}

void __saveds __asm DevAbortIO(register __a1 struct IORequest *ior)
{
    /* .... */
}

Only four functions need to be implemented:

  • The UserDevInit function is called by the kernel when the device driver is loaded. In my proxy device driver, it opens a connection the actual hard disk device driver. This function returns 0 if the initialization succeeds and 1 if it fails.
  • The UserDevCleanup function is called by the kernel when the device driver is unloaded. It closes the connection to the actual device driver and cleans up all related resources.
  • The DevBeginIO function is invoked when a device driver receives an I/O request from a client application. This function checks the command type and reverses the data payload, if needed.
  • The DevAbortIO function is invoked when a device driver receives an abort request from a client application. This function does nothing in my proxy driver.

In addition to implementing these functions, these functions also require the compiler to follow a certain calling convention. Normally, a compiler has some freedom to choose how function parameters are propagated, but for an Exec device driver, CPU registers need to be used in a very specific way.

The implementation process


As I have explained earlier, device drivers accept I/O requests. I/O requests are function calls consisting of a command number and some data payload. Device driver commands are somewhat standardized -- there are commands that all devices accept, but also device-specific commands. The Amiga development reference provides an overview of device drivers that are bundled with AmigaOS and their commands.

Custom drivers typically follow the same kinds of conventions. For example, the driver for my SCSI controller that comes with my expansion board (evolution.device) accepts the same commands that Commodore's SCSI driver does (scsi.device). This driver is bundled with Kickstart 2.0 and newer.

To implement my proxy driver, I have implemented all the SCSI driver commands described in the manual. For the CMD_READ, CMD_WRITE and TD_FORMAT commands I am using a routine that reverses the order of the bytes in the data field.

Although the implementation process looked simple, I ran into a number of issues. In my first attempt to read my PC partition, the system crashed. To diagnose the problem, I have augmented the driver code with some conditional debugging print statements, such as:

#ifdef DEBUG
    KPrintF("Target device: %s opened successfully at unit: %ld\n", config.device, unit);
#endif

The KPrintF function call sends its output over a serial port. In FS-UAE, I can redirect the output that is sent over a serial port to a TCP socket, by adding the following setting to the emulator's configuration:

serial_port = tcp://127.0.0.1:5000/wait

Then by using a telnet to connect to the TCP socket (listening on port 5000) I can inspect the output of the driver:

$ telnet localhost 5000

I can also connect my null modem cable to my real Amiga 500 and inspect the output in minicom. I need to use a baud rate setting of 9600 bits per second.

With my debugging information, I discovered a number of problems that I had to correct:

  • It seems that the CrossDOS and fat95 DOS drivers do not only send SCSI driver commands. They also seem to be sending a number of trackdisk-specific device commands. I had to relay these commands through my proxy driver as well.
  • The fat95 driver also works with New Style Devices (NSD). An important feature addition of NSD devices is that they are not restricted by the 32-bit integer limit. As a result, they can handle devices providing more than 4 GiB of storage capacity. They seem to use their own commands -- one of them checks whether a device is a new style device. I was not properly relaying a "command not implemented" error for this case, causing a crash.
  • There is a trackdisk command: TD_ADDCHANGEINT to configure a software interrupt that activates on a disk change. It seems that this command never sends an answer message. My driver ran into an infinite loop because it was still expecting an answer. I also learned that in UAE, the uaehf.device driver seems to work with this command, but my real hard drive's SCSI driver (evolution.device) seems to crash when this command is called. I ended up ignoring the command -- it seems to do no harm.
  • For write operations, I need to reverse bytes before writing a block, but I also need to unreverse them again after the write operation has completed. It turns out that file system drivers do not re-read previously written blocks.

Although I prefer to avoid debugging strategies, I also know that it is unavoidable for this particular development scenario -- specifications are never complete and third-party drivers may not strictly follow them. You really need to figure out how all of it works in practice.

I am very fortunate to have an emulator at my disposal -- it makes it very easy to have a safe test setup. I also do not have to be afraid to mess up my PC hard-drive -- I can simply make a dump of the entire contents of my hard drive and restore it once my system has been messed up.

In the 90s, I did not have such facilities. Driver development would probably have been much harder and more time consuming.

Usage


Earlier in this blog post, I have shown a non-working mount configuration for my PC hard-drive partition (PCDH0:). With my proxy driver and some additional settings, I can produce a working configuration.

First, I must configure the KCS HD proxy device in such a way that it becomes a virtual PC hard drive device for my emulated PC drive.

I can determine the offset (in bytes) of my KCS partition, by using the following formula:

Offset = Surfaces * Sectors per side * Lowest cylinder * Block size

Applying the formula with the properties discovered in SysInfo results in:

Offset = 1 * 544 * 376 * 512 = 104726528

After determining the partition offset, we must determine the exact offset of the MBR. Typically, it is at the beginning of the Amiga partition storing the PC hard drive data but there may be situations (e.g. when using Kickstart 1.3) that the MBR is moved somewhat.

I have developed a utility called: searchmbr can help you to determine the exact offset (what is does is searching for a 512 bytes block that ends with the MBR signature: 0x55AA):

> searchmbr evolution.device 0 104726528
Checking block at offset: 104726528
MBR found at offset: 104726528

In the output above, we see that the MBR is at the beginning of the Amiga partition.

With this information, I can create a configuration file: S:KCSHDProxy-Config for the proxy driver that has the following contents:

104726528
evolution.device

In the above configuration, the first line refers to the offset of the PC partition (in bytes) and the second line to the device driver of the hard drive.

It turns out that CrossDOS does not know how to interpret an MBR -- it needs to know the exact position of the first PC partition.

(As a sidenote: the fat95 DOS driver does have a feature to autodetect the position of a partition. If you set the LowCyl value to 0, then the fat95 driver will attempt to auto-detect a partition).

After configuring the proxy driver, the querypcparts tool can be used to retrieve the offset and size of the partitions on the PC hard drive:

$ querypcparts 0
Partition: 1, first sector offset: 34, number of sectors: 202878

In my example case, there is only one MS-DOS partition -- it resides at offset 34. Its size is 202878. Both of these properties are measured in sectors.

With the above information, I can make adjustments to our previous mount configuration (of the PCDH0: device). Rather than using the real SCSI driver for our hard drive, we use the KCS HD proxy driver (that reverses the bytes and translates the offsets):

Device = kcshdproxy.device

As explained earlier, partition offsets and sizes are typically specified in cylinders, heads and sectors. A PC hard drive typically does not use the same value for the amount of blocks per track that an Amiga partition does -- as a result, the boundaries of a PC partition are typically not aligned to cylinders.

To cope with this, we can change the following properties to 1, so that we can specify a PC partition's offsets in sectors:

BlocksPerTrack = 1
Surfaces       = 1

Because the driver translates offsets in such a way that the beginning of the virtual PC hard drive starts at 0 and the offsets are measured in cylinders, the LowCyl property should correspond to the offset of the first sector reported by the querypcparts tool:

LowCyl = 34

We can compute the HighCyl boundary with the following formula:

HighCyl = First sector offset + Number of sectors - 1

Applying the formula with the values from the querymbr tool results in the following value:

HighCyl = 202911

After making the above modifications, I can successfully mount the PCDH0: device in AmigaOS and browse it contents in the Amiga Workbench:


Isn't it awesome? :-)

The driver also works in Kickstart 1.3, giving me the classic Amiga 500 experience:


Availability


The KCS HD proxy driver can be obtained from my GitHub page and Aminet. Currently, it has been tested with the CrossDOS and fat95 filesystem DOS drivers.

The KCS PowerPC board supports many kinds of SCSI controllers -- unfortunately, beyond uaehf.device and my expansion board's SCSI driver: evolution.device, I have not been able to test any other configurations. I believe it should work with any driver that is scsi.device compatible, but I do not have the means to test this. Use this driver at your own risk!

Future work


Although it is nice to have a solution to easily exchange files with my PC hard drive partition from AmigaOS, not all my problems have been solved -- I also sometimes download stuff from the Internet to my Linux PC that I may want to transfer to my emulated PC partition. With the SCSI2SD device as a replacement hard drive, transferring data to my Amiga "hard drive" is very easy -- I can insert the SD card into the card reader of my PC and get access to its data.

Unfortunately, on Linux, I have the same problem -- Linux has a FAT filesystem driver, but it does not understand the raw data because each pair of bytes is reversed. In the future, I may also have to develop a tool that implements the same kind of solution on Linux.

Tuesday, February 18, 2025

Running NetBSD on my Amiga 4000


In my last blog post, I have shown how I have been using Linux on my Amiga 4000. Running Linux on an Amiga has always been a fascinating use case to me -- I have developed strong interests in both areas from a very young age.

Shortly after buying my second-hand Amiga 4000 in 2022, I discovered an interesting Reddit article stating that NetBSD (another UNIX-like operating system) supports the Amiga. The title of this article was IMO somewhat confusing, because it suggests that support for the Amiga was recently added, but that statement is false -- NetBSD already supports the Amiga since its 1.0 release (done in 1994). Amiga support was heavily improved in 2022.

NetBSD is an interesting operating system -- it is the first BSD derivative that was forked from 386BSD by a group of developers in 1992 that were dissatisfied with its development process. FreeBSD is a fork started by another group of developers in the same year. OpenBSD was forked from NetBSD in 1995 and DragonFly BSD from FreeBSD in 2003 due to disagreements.

Each of these BSD derivatives have different goals and standards. NetBSD's focus is portability and simplicity. Its slogan is "of course it runs NetBSD" and facilitates a design and infrastructure that makes porting to new platforms relatively easy. As a result, it has been ported to many kinds of CPUs and hardware architectures, including the PC and the Amiga.

The other BSD derivatives have different goals -- OpenBSD is focused on security and correctness and FreeBSD's purpose is to be a more balanced/general purpose BSD derivative. DragonFly BSD's focus is threading and symmetric multiprocessing.

Another interesting story about NetBSD and the Amiga is its porting process. In order to port NetBSD to the Amiga, the build tool chain had to be ported to AmigaOS first. The result of this porting process is a library project called: ixemul.library providing a UNIX system call interface on top of AmigaOS.

The ixemul.library is the main ingredient of the Geek Gadgets distribution that offers a large collection of UNIX utilities that can be used on top of AmigaOS. Some time ago, I have used the Nix package manager to automate package builds with these tools to port my IFF file formats project from Linux to AmigaOS and creating a viewer program for AmigaOS.

Although NetBSD is an interesting operating system, I have never used any of the BSD derivatives as much as I have used Linux. For example, I have never used any of them as a desktop operating system.

I have the most experience with FreeBSD -- I have used it for web servers, as a porting target for the Nix package manager so that we could add another build target to our university's build farm (that uses Hydra: the Nix-based continuous integration system), and as a porting target for my my experimental Nix process management framework.

My experience with OpenBSD and NetBSD is more limited -- the only notable use case I have with them is to use them as porting targets for the Nix package manager, similar to FreeBSD. Apart from a few simple experiments, I never did anything meaningful with DragonFly BSD.

Because of the impact of the article and my past experiences with NetBSD, trying it out on my Amiga 4000 was high on my TODO list. It was a nice experience -- beyond installing NetBSD it was also the first time for me to use it as an operating system to "do work with", rather than a development target.

In this blog post, I will report about my experiences.

Getting started with NetBSD for the Amiga


In my previous blog post (covering Linux on Amiga), I explained that it was a bit of a challenge to start, because much of the information that I need is outdated and scattered.

With NetBSD, the starting process was much easier for me -- NetBSD for the Amiga has IMO a very well written web page from which I can easily obtain the installation CD-ROM ISO file and Amiga-specific installation instructions.

Moreover, contrary to Debian, I can use the latest version of NetBSD (version 10.1 at the time writing this blog post) on my Amiga 4000. With Debian, I was not able to use any version newer than 3.1.

(To be precise: the m68k port was discontinued after Debian 3.1, but re-introduced in Debian 9.0. Unfortunately, 9.0 and newer versions did not work for me. The latest version of Debian is 12.9 at the time writing this blog post).

Installing NetBSD on the Amiga 4000


The installation procedure does not appear to be very user friendly, but is IMO not too difficult if you already have some experience with AmigaOS and a UNIX-like operating system.

To produce a working NetBSD installation on an Amiga I followed their documentation. From a high-level point of view it consists of the following steps:

  • Downloading an ISO file and burning it to a writable CD-ROM.
  • Booting up my Amiga 4000 and creating a partition layout suitable for using NetBSD. Similar to Linux, NetBSD can be installed next to an existing AmigaOS installation on a separate partition. There are a couple things that need to be kept in mind:

    • Partitioning must be done by using native AmigaOS tools, such as HDToolBox. NetBSD does not provide its own partitioning tool.
    • We must use HDToolBox to manually specify the correct partition identifiers for the NetBSD swap and root partition. Manual specification is a bit cumbersome, but necessary -- HDToolBox does not recognize these partition types by itself
    • We must make the swap and root partitions bootable. Furthermore, we need to allow custom boot blocks for these partitions. More information about this later.
    • The swap and root partitions must be under the 4 GiB limit. This limit turns out to be a hard limit for my machine as well -- even though my AmigaOS 3.9 homebrew kickstart ROM has a SCSI driver that is not restricted by the 4 GiB limitation, the boot menu does not seem to recognize bootable partitions above this limit.

      To address the 4 GiB requirement, I ended up creating a 1 GiB AmigaOS partition containing the Amiga Workbench, followed by a 128 MiB NetBSD swap partition, followed by a 2 GiB NetBSD root partition. The remaining disk space is used for partitions used by AmigaOS.
  • Transferring the miniroot filesystem image from the CD-ROM to the swap partition. The miniroot filesystem contains a minimal NetBSD installation capable of performing the actual installation of the NetBSD distribution.
  • Booting from the swap partition to set the NetBSD installation procedure in motion. The installer is text-based and asks a number of questions. The package installation process takes several hours on my Amiga to complete.
  • Rebooting the machine from the root partition and completing the NetBSD installation.

The NetBSD boot process


Similar to Linux, NetBSD has an interesting boot process -- using these operating systems require the presence of a running kernel. A kernel is not magically there, but needs to be loaded from an external location first. A boot loader is a program that is responsible for facilitating this process.

In my previous blog post, I have explained that are variety of ways to do boot loading. Most importantly, it is possible to load a kernel as quickly as possible after powerup using as few facilities from the ROM or the native operating system. This is a process that I will call cold booting.

In addition, it is possible to first boot into an existing operating system and load a kernel image while the existing operating system is running. Once the kernel is loaded it can take control of the system. This is a process that I called warm booting.

On the Amiga, it is a common practice to warm boot Linux (contrary to Linux on PCs, where cold booting is the normal practice). With NetBSD on Amiga it is actually the opposite -- cold booting is the preferred practice.

As I have already explained in the previous section, we must make the swap and root partitions bootable in HDToolBox. Furthermore, we must allow these partitions to use custom bootblocks.

When powering up my Amiga, I can hold both mouse buttons to enter the boot menu. In the boot menu, I can select the partition that I want to boot from (by default, it traverses the list of bootable drives/partitions top down and takes the first workable option):


In the above screenshot, our NetBSD partitions are also visible as possible boot partitions.

When I select: netbsd-root I can boot from my NetBSD root partition that contains a custom boot block providing a boot loader. The bootloader can be used to load a NetBSD kernel with my desired command-line parameters:


Although cold booting is the preferred practice according to the documentation, it is also possible to warm boot a NetBSD kernel. The loadbsd command can be used for this -- it is an Amiga tool that can load a kernel image from an Amiga partition with a number of kernel parameters. Once the kernel has been loaded, it can take control of the system.

There is yet another way to start NetBSD -- there is also a command-line tool called runbootblock. This tool can be used to automatically execute the code stored in a bootblock of a partition from a running AmigaOS session.

I guess this approach falls in between warm and cold booting -- it is warm booting a kernel from a running operating system using the facilities of a cold booting process. I guess this method can be called lukewarm booting.

Although I am fine with using the Amiga Kickstart's boot menu, I also find it convenient to boot into NetBSD when I am already in the Amiga Workbench. To do that, I have created a desktop icon called StartNetBSD to lukewarm boot into NetBSD:


The icon in the bottom right corner above executes the following script:

runbootblock -dscsi.device -u0 -pnetbsd-root

The above command specifies that we want to run the bootblock of the partition netbsd-root that resides on the first drive unit. We use the scsi.device driver to get access to the partition.

Lukewarm booting seems to work fine if I use the Amiga's chipset for the framebuffer. Unfortunately, when using my Cybervision 64/3D RTG card, the screen looks messed up. I discovered that AmigaOS' initialization of the VGA display is the culprit -- as a result, if I want to use NetBSD in combination with my RTG card, I always need to do a full cold boot.

Post installation steps


After completing the NetBSD installation, there are number of additional configuration steps that I had to perform to get all of my use cases supported. I took heavy inspiration from this NetBSD 9.2 Amiga post installation guide.

Switching off unneeded services


The first thing I noticed after first startup is that my NetBSD installation boots quite slowly. After logging in, it still behaves slowly.

By running ps I figured out that there is a background process: makemandb that consumes quite a bit of my CPU's time. Moreover, I noticed that postfix takes quite a bit of time to start on boot up.

Because I do not need these services, I have disabled them at startup by adding the following lines to /etc/rc.conf:

makemandb=NO
postfix=NO

Configuring user accounts


By default, there is only one user account -- the root user, that has full privileges. Moreover, the root user has no password set.

We can configure the root password by running the following command:

$ passwd

We can configure an unprivileged user account and set a password as follows:

$ useradd -m -G wheel sander
$ passwd sander

Enabling wscons


In the default installation, the command-line experience is somewhat primitive -- I only have a gray background with black colored text and a single terminal window.

To enhance the NetBSD command-line experience, I can enable wscons: NetBSD's platform-independent workstation console driver -- it handles complete abstraction of keyboards and mice and it can multiplex terminals.

To enable wscons, we first need to deploy a kernel that supports it -- the default kernel does not have that functionality built in.

A wscons-enabled kernel can be found on the NetBSD CD-ROM. I can replace the default kernel by logging into my NetBSD installation and running the following commands:

$ mount /dev/cd0a /cdrom
$ cd /
$ cp /cdrom/amiga/binary/kernel/netbsd-WSCONS.gz /
$ gunzip netbsd-WSCONS.gz
$ mv netbsd netbsd-ORIG
$ mv netbsd-WSCONS netbsd

In the above code fragment, I copy the wscons-enabled kernel from the NetBSD CD-ROM to the root directory, uncompress it, make a backup of the old kernel and finally replace the default kernel with the new kernel.

We must also enable the wscons service on startup. This can be done by adding the following line to /etc/rc.conf:

wscons=YES

To use multiple terminals, we must open /etc/ttys in a text editor and enable the ttyE1, ttyE2 and ttyE3 consoles by switching their 'off' flags to 'on':


Finally, we must reboot the system so that we can use the wscons-enabled kernel.

Configuring frame buffer video modes


Another thing I was curious about is how I can configure the output device and resolutions for the framebuffer. For example, when I boot up the kernel, NetBSD automatically uses my Cybervision 64/3D RTG card's display using a 640x480 resolution in 8-bit color mode.

Although I am happy to use my RTG card, I also want to have the ability to use Amiga's AGA chipset for graphics. Moreover, I want to have ability to switch to different graphics modes.

On Linux this can be done by passing the appropriate video parameter to the kernel. On NetBSD, this turns out to be a very tricky configuration aspect.

According to the boot manual page (that describes the NetBSD kernel's boot parameters), there is only one display-related kernel parameter: -A. The documentation says that this parameter enables AGA display mode, but it actually does two things -- it indeed enables AGA mode so that the display uses 256 colors, but it also configures the display to use a "double NTSC" screen mode (640x400, non-interlaced).

Without the -A parameter, the NetBSD kernel is instructed to use 8 colors and an NTSC high resolution interlaced screen mode (640x400). Although my Amiga has an AGA chipset, my LED TV does not seem to accept double NTSC or double PAL screen modes.

In addition to very limited native Amiga chipset configuration abilities, I did not see any kernel parameters that allow me to select my preferred framebuffer device. After some searching, I learned that it is not possible to provide more screen mode settings.

While studying the NetBSD post installation notes GitHub gist, I learned that I am not the only person running into problems with the display. In the gist, the author describes how he adjusted the display settings for the AGA display mode to match the settings of a VGA output by copying the settings from the Linux amifb driver and cross compiling the NetBSD kernel for the Amiga.

I ended up cross compiling a kernel myself as well by following the same instructions. To do the cross compilation, I have downloaded a NetBSD 10.1 distribution ISO file for x64 machines and installed it in a VirtualBox virtual machine on my PC.

In this VirtualBox virtual machine, I have downloaded the NetBSD 10.1 source code by running:

$ cvs -d anoncvs@anoncvs.NetBSD.org:/cvsroot checkout -P -r netbsd-10-1-RELEASE src

I can set up the cross compilation toolchain by running:

$ cd src
$ ./build.sh -m amiga tools

The above command automatically downloads the required dependencies (e.g. the source tarballs for the cross compiler, cross linker etc.) and compiles them.

My first goal was to see if I can make the required adjustments to force the kernel to use the Amiga chips to display the framebuffer. I ended up editing two files and disabling a number of options.

The first file that I have changed is the following: sys/arch/amiga/conf/GENERIC. I have commented out the following properties:

#options 	RETINACONSOLE	# enable code to allow retina to be console
#options 	CV64CONSOLE	# CyberVision console
#options 	TSENGCONSOLE	# Tseng console
#options 	CV3DCONSOLE	# CyberVision 64/3D console

#options 	GRF_AGA_VGA	# AGA VGAONLY timing
#options 	GRF_SUPER72	# AGA Super-72

#grfrt0		at zbus0		# retina II
#grfrh0		at zbus0		# retina III

#grfcv0		at zbus0		# CyberVision 64
#grfet*		at zbus0		# Tseng (oMniBus, Domino, Merlin)
#grfcv3d0	at zbus0		# CyberVision 64/3D

#grf1		at grfrt0
#grf2		at grfrh0

#grf5		at grfcv0
#grf6		at grfet?
#grf7		at grfcv3d0

#ite1		at grf1			# terminal emulators for grfs
#ite2		at grf2			# terminal emulators for grfs

#ite5		at grf5			# terminal emulators for grfs
#ite6		at grf6			# terminal emulators for grfs
#ite7		at grf7			# terminal emulators for grfs

The most important property to comment out is the CV3DCONSOLE. Disabling the Cybervision 64/3D console ensures that my Cybervision 64/3D card never gets detected. As a result, NetBSD is forced to use the native Amiga chipset.

As a side effect of disabling the Cybervision 64/3D console option, I must also disable the corresponding color graphics driver (grfcv3d0), framebuffer device (grf7) and terminal emulator device (ite7).

In addition to Cybergraphics 64/3D, I have been disabling a number of additional features that I do not need. For example, I do not need any support for unorthodox resolutions (VGA, Super72). I can also disable support for additional RTG cards because I do not have them.

As a side effect of disabling their consoles, I must also disable their corresponding color graphics drivers, framebuffer devices and terminal emulation devices.

Another file that I need to modify is the wscons configuration (sys/arch/amiga/conf/WSCONS):

#no grfrt0	at zbus0
#no grfrh0	at zbus0

#no grf1		at grfrt0
#no grf2		at grfrh0

#no ite1		at grf1
#no ite2		at grf2

#no ite5		at grf5
#no ite6		at grf6
#no ite7		at grf7

In the above file, I also need to disable the color graphics, framebuffer and terminal emulation devices that I have commented out in the previous configuration file.

After configuring the kernel, I can compile it with the following command-line instruction:

$ ./build.sh -m amiga kernel=WSCONS

The resulting kernel image can be found in: src/sys/arch/amiga/compile/obj/WSCONS/netbsd. I have copied the resulting kernel image to my NetBSD root partition and named it: netbsd-NORTG.

If I want to use a NetBSD session using my Amiga's chips (with a 8-color interlaced high resolution screen mode), then I can provide the following command to the bootloader:

netbsd-NORTG -Sn2

Resulting in the following NetBSD session:


As can be seen in the picture above, I have successfully instructed the bootloader to load my custom NORTG NetBSD kernel forcing the operating system to use the Amiga display driver.

After compiling my custom NORTG kernel, I have also been experimenting with the kernel source code to see if I can somehow avoid using the incompatible "double NTSC" screen mode. Unfortunately, I discovered that screen modes are hardcoded in the kernel (to be precise, I found them in this file: src/sys/arch/amiga/dev/grfabs_cc.c).

After trying out a few display settings (including the VGA monitor settings described in the GitHub gist) I discovered that if I cut the amount of scan lines in half for the AGA screen mode, I can get an acceptable display in AGA mode (at least in the console).

Unfortunately, despite this achievement I realized that my customized AGA mode is useless -- if I want to use the X Window System, the display server does not seem to know how to use my hacked screen mode. As a result, it fails to start.

I eventually gave up investigating this problem and decided to simply use the non-AGA graphics mode.

Using the X Window System


A nice property of the X Window System on NetBSD/Amiga is that it integrates with wscons. As a result, it has a very minimal configuration process.

Something that appears to be missing is the presence of a pseudo terminal device file. Without it, xterm refuses to start. I can create this missing device file by running the following commands:

$ cd /dev
$ ./MAKEDEV pty0

Another nice property is that, in contrast to the X Window System for Debian Linux/Amiga, the NetBSD version also supports the Amiga chipset for displaying graphics.

When using a NORTG kernel console session, I can simply run: startx and after a while, it shows me this:


The picture above shows a CTWM session with some running applications. The only two downsides of using the X Window System on the Amiga is that it takes quite a bit of time to boot up and I can only use monochrome graphics.

To have a color display, I need to enable AGA mode. As already explained, I cannot use the AGA screen mode because my display cannot handle double PAL or double NTSC screen modes.

Adjusting screen modes


As far as I could see, it is not possible to change screen modes at runtime while using the Amiga chipset.

With my Cybervision 64/3D RTG card it is actually possible to change screen modes at runtime. To do that, I need to load a screen mode definition file. I made an addition to the /etc/rc.local script to load such a definition file at boot time:

$ grfconfig /dev/grf7 /etc/gfxmodes

In the above command-line instruction, the /dev/grf7 parameter corresponds to the Cybervision 64/3D framebuffer device (this device file can be determined by looking at the output of the dmesg command) and /etc/gfxmodes to a screen mode definition file.

Writing a screen mode definition file is a bit cumbersome. Fortunately, from my previous experiments with the Picasso96Mode Amiga preferences tool, I discovered that this tool also has a feature to generate NetBSD 1.2 and 1.3 compatible mode definitions. I learned that NetBSD 10.1 still uses the same format as NetBSD 1.3

To automatically save these mode settings to a file, I need to open a CLI in my Amiga Workbench and run the following command:

SYS:Prefs/Picasso96Mode >T:gfxmodes

The above command opens the Picasso96Mode preferences program and redirects the standard output to T:gfxmodes.


In the Picasso96 GUI, I must select all relevant screen modes and select the menu option: Mode -> Print Mode to export the screen mode (as shown in the picture above).

To get a reasonable coverage, I start with the lowest resolution and color mode (8-bit). Then I move to higher color modes, then higher resolutions etc. until all the screen modes that I need are covered.

After exporting all relevant screen modes, I need to open the T:gfxmodes file in a text editor and remove all comments and NetBSD 1.2 entries. What remains is a file that has the following structure:

x 26249996 640 480 8 640 688 768 792 479 489 492 518 default
x 43977267 800 600 8 800 832 876 976 599 610 620 638 +hsync +vsync
x 67685941 1024 768 8 1024 1072 1184 1296 767 772 777 798 default

In the above file, each line represents a screen mode. The first defines a 640x480 resolution screen, the second an 800x600 resolution screen and the third a 1024x768 resolution screen. All three screen modes use an 8-bit color palette.

We need to slightly adjust this file to allow it to work with NetBSD -- the first column (that contains an 'x' character) represents a mode number. We need to give it a unique numeric value or a 'c' to define the screen mode of the console.

If I want my console to use a 640x480 screen mode, and keep the remaining screen modes as an option, I can change the above mode definition file into:

c 26249996 640 480 8 640 688 768 792 479 489 492 518 default
1 26249996 640 480 8 640 688 768 792 479 489 492 518 default
2 43977267 800 600 8 800 832 876 976 599 610 620 638 +hsync +vsync
3 67685941 1024 768 8 1024 1072 1184 1296 767 772 777 798 default

In the above file, I have replaced the 'x' characters by unique numeric values and I have duplicated the 640x480 mode to be the console screen mode.

By copying the above file to /etc/gfxlogin on my NetBSD root partition, I can switch between screen modes if desired.

I learned that to use the X Window System in combination with my Cybervision 64/3D card, I also require a modes defintion file. By default, the X Window System uses the first screen mode (screen mode: 1). When I start the X server, I eventually get to see the following display:


Installing custom packages


Contrary to Linux, which is a kernel that needs to be combined with other software packages (for example, from the GNU project) to become a functional distribution, NetBSD is a complete system. However, I do need some extra software to make my life more convenient, such as the Midnight Commander.

NetBSD includes a package manager: pkgsrc and a package repository with a variety of software packages. Automatically downloading and installing prebuilt binaries and their dependencies can be conveniently done with a front-end for pkgsrc: pkgin.

Unfortunately, as I have already explained in my previous blog post, my Amiga 4000 machine does not have a network card. The only means I have to link it up to the Internet is a null-modem cable which is too slow for downloading packages.

Fortunately, the web-based interface of pkgsrc is easy enough to manually download the packages I want and their dependencies. For example, to obtain Midnight Commander, I can open the following page: https://ftp.netbsd.org/pub/pkgsrc/current/pkgsrc/sysutils/mc46/index.html, download the m68k tarball, follow the runtime dependencies, download their tarballs, and then the transitive dependencies etc.

To install the downloaded packages on NetBSD, I just copy them to a directory on my NetBSD drive. Then I can install them with the pkg_add command:

$ pkg_add /root/packages/mc-4.6.1nb28.tgz

The result is that I can use Midnight Commander on NetBSD on my Amiga:


Setting up a terminal connection between the Amiga and PC with a null-modem cable


In my previous blog post about running Linux on my Amiga, I have been using a null-modem cable to link the Amiga to my PC. With NetBSD, I can do the same thing. For example, on my Linux PC I can start a terminal session over the serial port:

$ agetty --flow-control ttyUSB0 19200

and use Minicom on my NetBSD/Amiga installation to remotely connect to it.

I can also do the opposite -- I can enable a serial console on NetBSD by editing /etc/ttys and enabling a terminal for the /dev/tty00 device:

tty00    "/usr/libexec/getty std.9600"    unknown    on    secure

Then I can use minicom on my Linux PC to remotely connect to my Amiga:

$ minicom -b 9600 -D /dev/ttyUSB0

The result can be seen in the following picture:


Connecting to the Internet


Similar to my Linux setup, I can also connect my NetBSD/Amiga installation to the Internet. The recipe is exactly the same. I took inspiration from the Linux PPP HOWTO for this.

First, I need to set up a link end point on my Amiga 4000, with the following command:

$ pppd -detach crtscts lock noauth defaultroute 192.168.1.2:192.168.1.1 /dev/tty00 19200

Then I can configure my desktop PC (which has a connection to the Internet by using an ethernet card):

$ pppd -detach crtscts lock noauth proxyarp 192.168.1.1:192.168.1.2 /dev/ttyUSB0 19200

Then I should be able to ping my desktop PC from the Amiga by running:

$ ping 192.168.1.1

With some additional steps, I can connect my Amiga 4000 to the Internet by using my desktop PC as a gateway.

First, I need to enable IP forwarding on my desktop PC:

echo 1 > /proc/sys/net/ipv4/ip_forward

Then, on my desktop PC, I can enable network address translation (NAT) as follows:

INTERNAL_INTERFACE_ID="ppp0"
EXTERNAL_INTERFACE_ID="enp6s0"

iptables -t nat -A POSTROUTING -o $EXTERNAL_INTERFACE_ID -j MASQUERADE
iptables -A FORWARD -i $EXTERNAL_INTERFACE_ID -o $INTERNAL_INTERFACE_ID -m state --state RELATED,ESTABLISHED -j ACCEPT
iptables -A FORWARD -i $INTERNAL_INTERFACE_ID -o $EXTERNAL_INTERFACE_ID -j ACCEPT

In the above example: ppp0 refers to the PPP link interface and enp6s0 to the ethernet interface that is connected to the Internet.

In order to resolve domain names on the Amiga 4000, I need to copy the nameserver settings from the /etc/resolv.conf file of the desktop PC to the Amiga 4000.

After doing these configuration steps I can, for example, use w3m to visit my homepage:


Exchanging files


Similar to my Amiga/Linux set up, I also want to the option to exchange files to and from my NetBSD/Amiga setup, for example, to try out stuff that I have downloaded from the Internet. For my NetBSD setup I can use the same two kinds of approaches.

Exchanging files with the memory card on my Linux PC


In my previous blog post I have shown that it is possible to take the Compact Flash card from my Amiga's CF2IDE device and put it in the card reader of my PC. Linux on my PC does not recognize an Amiga RDB partition table, but I can use GNU Parted to determine the partitions' offsets and use a loopback device to mount it:

$ parted /dev/sdb
GNU Parted 3.6
Using /dev/sdb
Welcome to GNU Parted! Type 'help' to view a list of commands.
(parted) unit B                                                           
(parted) print                                                            
Model: Generic- USB3.0 CRW-CF/MD (scsi)
Disk /dev/sdb: 32019111936B
Sector size (logical/physical): 512B/512B
Partition Table: amiga
Disk Flags: 

Number  Start         End           Size          File system  Name         Flags
 1      56899584B     1130766335B   1073866752B   asfs         DH0          boot
 2      1130766336B   1265338367B   134572032B                 netbsd-swap  boot
 3      1265338368B   3953166335B   2687827968B   sun-ufs      netbsd-root  boot
 4      3953166336B   6100899839B   2147733504B   asfs         DH1
 5      6100899840B   8248633343B   2147733504B   asfs         DH2
 6      8248633344B   16838664191B  8590030848B   asfs         DH3
 7      16838664192B  32019111935B  15180447744B  asfs         DH4

(parted) quit

In the above code fragment, I have invoked GNU parted to read the partition table of my Amiga drive (/dev/sdb), switched the units to bytes, and printed the partition table. The third partition entry (Number: 3) refers to the NetBSD root partition on my Amiga 4000.

Linux is capable of mounting UFS partitions. I can use the start offset and size fields in the above table to configure a loopback device (/dev/loop0) referring to my Amiga drive's NetBSD partition:

$ losetup --offset 1265338368 --sizelimit 2687827968 /dev/loop0 /dev/sdb

Then I can mount the partition (through the loopback device file) to a directory:

$ mount /dev/loop0 /mnt/amiga-netbsd-partition

And then I can read files from the Amiga's NetBSD partition by visiting /mnt/amiga-netbsd-partition. Unfortunately, my Linux kernel's UFS module does not seem to have write support enabled -- it appears that UFS write functionality is experimental and disabled by default. As a consequence, I can only read files from the partition.

When the work is done, I must unmount the partition and detach the loopback device:

$ umount /mnt/amiga-netbsd-partition
$ losetup -d /dev/loop0

I have also been investigating how I could exchange files with my PC if NetBSD were my desktop operating system. I learned that there is the vndconfig command to configure a pseudo disk device (which is mostly feature comparable to a Linux loopback device), but I could not find any facilities to configure the partition offets.

Exchanging files between the AmigaOS and NetBSD operating systems


Similar to my Amiga Workbench 3.1/Linux hard drive configuration, I also want the ability to exchange files between my AmigaOS and NetBSD installation on the same system.

NetBSD on Amiga natively supports mounting Amiga Fast Filesystem partitions. For example, if I have such a partition I can automatically mount it on startup by adding the following line to /etc/fstab:

/dev/wd0d /mnt/harddisk ados rw 0 0

As with my other Compact Flash card, I have picked Smart Filesystem (SFS) over Amiga's Fast File system for the same reasons -- I need a file system that is more suitable for large hard drives. Unfortunately, it seems that there are no facilities for NetBSD to read from or write to Smart Filesystem partitions.

However, I can do the opposite -- a Berkeley Fast File System handler for AmigaOS seems to exist that offers read and write support.

Installing the package is similar to the Ext2 handler described in the previous blog post:

  • Unpacking the LhA file into a temp directory
  • Copying the l/BFFSFileSystem file to L:
  • Creating a DOSDriver mount entry to get the partition mounted.

Creating the DOSDriver mount entry was a bit tricky. I did the following steps:

  • I used the doc/MountList.BFFS file from the LhA archive as a template by copying it to DEVS:DOSDrivers/BH0. In the destination file, I need to adjust a number of properties that we must look up first.
  • I can use HDToolBox to determine the start and end cylinders of the NetBSD root partition.
  • I can use SysInfo to determine the amount of surfaces and sectors per side, by opening the "DRIVES" function and selecting a random hard drive partition:

  • Then I need to adjust the partition's DOSDriver file: DEVS:DOSDrivers/BH0:
    • I must remove all examples, except the BH0: example
    • The LowCyl and HighCyl need to match the properties that we have discovered with HDToolBox.
    • The Surfaces property must match the value from SysInfo
    • The BlocksPerTrack property must match the Sectors per side property in SysInfo.
  • Finally I can make an icon for the BH0 DOS Driver, by copying the PC1.info file to BH0.info and removing the UNIT=1 tooltip (by using the icon information function).

The result is that I can access my NetBSD root partition from AmigaOS:


The screenshot above shows an Amiga Workbench 3.9 session in which I have opened the NetBSD root partition.

Running NetBSD/Amiga in FS-UAE


In my previous blog post, I have shown that it is also possible to install and run Linux in FS-UAE, an Amiga emulator. Using an emulator is convenient for experimentation and running software at greater speeds than the real machine.

To run a different operating system, we must edit the FS-UAE configuration in a text editor and change the configuration to use a hard file. Moreover, we need to enable IDE emulation for the hard-drive and CD-ROM devices:

hard_drive_0 = mydrive.hdf
hard_drive_0_controller = ide
hard_drive_0_type = rdb
cdrom_drive_0_controller = ide1

The above configuration properties specify the following:

  • We want to use a hard file: mydrive.hdf
  • The controller property specifies that we need IDE controller emulation -- this property is required because NetBSD does not work with Amiga drivers. Instead, it wants to control hardware itself.
  • The type property specifies that the hard drive image contains an RDB partition table. This property is only required when the hard file is empty. Normally, the type of a hard file is auto detected.

The result is that I can run NetBSD conveniently in FS-UAE:


As with my Linux installation, I can also take the Compact Flash card in my Amiga's CF2IDE drive (containing the NetBSD installation), put it in the card reader of my PC and use it in FS-UAE.

I need to change the hard drive setting to use the device file that corresponds to my card reader:

hard_drive_0 = /dev/sdb

In the above code fragment: /dev/sdb corresponds to the device file representing the card reader. I also need to make sure that the device file is accessible by an unprivileged user by giving it public permissions, by running the following command (as a root user):

$ chmod 666 /dev/sdb

Conclusion


In this blog post I have shown how I have been using NetBSD on my Amiga 4000. I hope this information can be of use to anyone planning to run NetBSD on their Amigas.

Compared to running Linux on Amiga, there are pros and cons. I definitely consider the homepage and documentation of NetBSD's Amiga port to be of great quality -- all required artifacts can be easily obtained from a single location and the installation procedure is well documented.

Moreover, NetBSD 10.1 (released in December 2024) is considerably newer than Debian 3.1r8 (released in 2008) and provides more modern software packages. Furthermore, the X Window System in NetBSD supports the Amiga chipset for displaying graphics -- the Debian Linux version does not.

NetBSD also has a number of disadvantages. Foremost, I consider its biggest drawback its speed -- it is considerably slower than my Debian Linux installation. This is probably due to the fact that modern software is slower than older software, not because Linux is superior to NetBSD when it comes to speed. Most likely, if I can manage to make a modern Linux distribution work on my Amiga, then it would probably also be much slower than Debian 3.1r8.

Another drawback is that I have much fewer options to control the framebuffer in NetBSD. With Linux I can easily select the video output device, resolutions and color modes at boot time and run time. In NetBSD the options are much more limited.

Beyond these observable Amiga differences between NetBSD and Linux, there are many more differences between NetBSD and Debian Linux, but I will not cover them in this blog post -- this blog post is not a NetBSD vs Linux debate.

Finally, I want to say that I highly appreciate the efforts of the NetBSD developers to have improved their Amiga port. NetBSD is definitely usable and useful for the Amiga. It would be nice if some areas could be improved even further.

Sunday, January 26, 2025

Running Linux on my Amiga 4000


In a recent blog post, I have described how I have been using my Amiga 4000 in 2024, including how to install the 3.1 and 3.9 AmigaOS versions from scratch and showing a few interesting use cases.

After completing this project, my Amiga 4000 experiments have continued. Recently, I have managed to run Linux on my Amiga 4000.

It turns out that making Linux work on such an old vintage machine (and somewhat uncommon hardware architecture) is challenging. There is quite a bit of information available on the Internet explaining how to do this, but not all of it is of good quality, some of it is heavily outdated and useful information is scattered.

As a result, I have decided to write a blog post about my collected knowledge and experiences.

My motivation


Some readers may probably wonder why I want to run Linux on such an old vintage machine? Aside for nostalgic reasons and fun-oriented programming projects, I have an interesting connection with both Amiga machines and Linux. Actually, my Amiga experiences eventually brought me to Linux.

IMO this is an interesting story, but feel free to skip to the next section. :-)

Commodore's demise


After Commodore's demise in 1994, the Amiga remained my main working machine for several years, but I could strongly feel the decline in the years after 1994.

Foremost, no newer Amiga models appeared. In 1995, a major Dutch Amiga magazine (Amiga X) was canceled. I was no longer receiving any software updates and I was still mostly using the same applications and games.

When the Internet and the World Wide Web became a mainstream service (in mid-1996) I realized that the PC had surpassed the Amiga in all thinkable areas. It was clear to me that the Amiga has become an obsolete platform and it was time to move on.

My transition to the PC was not abrupt. In the years before Commodore's demise I already slowly grew accustomed to using PCs -- I already knew how to use MS-DOS, because I had access to friends' PCs and PCs on my elementary school. Moreover, I also had plenty of hands on experience thanks to the KCS PowerPC board in my Amiga 500, capable of emulating an XT-based PC.

Transition to the PC as a main machine


Although I never hated MS-DOS, I always considered it a primitive working environment compared to AmigaOS. It was mainly text-oriented: a black screen with gray text. It only had a simple filesystem capable of using file names that consist of a maximum of eight characters (optionally with a three character extension). There was no multi-tasking support.

(As a sidenote: If you want a graphical desktop environment, then you can start a graphical shell, such as Windows 3.1. Windows 3.1 was a DOS application, not a full operating system. Although it was nice to use it, for playing games you generally did not need it.)

In late 1996, my parents bought a brand new PC with Windows 95 -- the successor to Windows 3.1. I was happy and a bit disappointed at the same time.

Foremost, I was very happy with all new abilities that this new PC provided me: better graphics, better sound, blockbuster games that were not available for the Amiga (most notably Wolfenstein 3D and Doom), newer productivity applications that offered more features than comparable Amiga applications and access to the Internet and the World Wide Web.

Moreover, Windows 95 overcame a number of limitations that MS-DOS (and Windows 3.1 as a shell) used to have, such as pre-emptive multi-tasking, long filenames and better graphics. From a visual perspective, a Windows 95 working environment did not feel primitive compared to AmigaOS and a hybrid MS-DOS / Windows 3.1 environment.

I was not very fond of Windows 95's stability. It used to crash quite frequently with a blue-screen of death.

Also, I considered Windows 95 a big and bloated operating system. AmigaOS only used a couple of megabytes on a hard drive installation, but for Windows 95 I needed several hundred of megabytes. From a disk space perspective, Windows 95 was a huge sacrifice. Back then our hard drive was only 2 GiB. The Windows 95 boot process was also considerably longer than the Amiga Workbench.

AmigaOS is more modular -- it can easily be stripped down in such a way that you can boot it from a single double density floppy disk. Although it is possible to create a bootable/customizable MS-DOS floppy disk, it is not possible to boot into a customized, stripped down version of Windows by conventional means.

Windows 95 was still a hybrid MS-DOS / Windows based operating system, even though it did a number of things to conceal its MS-DOS heritage. For example, it did not boot into a DOS prompt, but at startup you could still see that it was loading DOS drivers. For conventional Windows productivity application usage, you typically did not need to know about Windows 95's DOS heritage.

However, most of the games I used to play in late 1996/early 1997 were still MS-DOS based. It was quite a challenge to make some these MS-DOS games work thanks of the legacy of the segmented memory model of the Intel CPU.

For example, some games still rely on enough available conventional memory. In the default Windows 95 installation, the amount of free conventional memory was sometimes not enough. I have played quite a lot with MEMMAKER to optimize my system to have more conventional memory available. Using MEMMAKER sometimes bricked the boot process of Windows 95.

There were also quite a few annoying bugs that could brick my system. I still remember that a Windows-bundled application called Active Movie once reported that it lost its file associations. When it asked me to restore them it connected all file types to Active Movie including .EXE files rendering my system impossible to use.

In several occasions, I also learned in a painful way that certain application installers could brick the Windows registry rendering my system unusable.

Because of these issues I ended up reinstalling Windows 95 so many times that I can still remember its serial key.

First exposure to Linux: reading a magazine


At some point, my dad subscribed himself to a PC magazine: c't magazine. Because Windows 95 had an interesting stability reputation, magazines sometimes reported about alternatives. Thanks to these magazines, I learned about Linux the first time in early 1997.

When I first read about it, I could not believe that a single student named, named Linus Torvalds (at that time he was still a student at Helsinki university), could create an operating system that could measure up with Windows (developed by a multi-billion dollar company) and do certain things better.

I was not convinced that Linux was a realistic alternative to Windows at that time. Moreover, there were also many things that I did not understood about Linux. More about this later :)

Second exposure: DOS UAE


Still in early 1997, I discovered the Ultimate/Unusable/UNIX Amiga Emulator (UAE) that makes it possible to emulate an Amiga on different kinds of computer systems.

UAE is portable emulator -- it came in several variants for various operating systems. The first UAE variant that I used was DOS UAE. Because I was still fond of the Amiga, I decided to give it a try.

Getting DOS UAE to run was not an easy job. I needed to study the manual and I found out that the DOS UAE distribution also included the documentation of the core UAE distribution.

By reading the documentation of the core UAE distribution, I learned a couple of interesting things. For example, what I found interesting is that it was possible to get access to the UAE source code. The core UAE distribution was primarily developed for UNIX-like systems (at that time UNIX was a completely new word to me that I did not understand), most notably: Linux.

For non-UNIX like operating systems, UAE was forked into a number of variants, such as: DOS UAE for MS-DOS, WinUAE for Windows and MacUAE for the classic Apple Macintosh. Changes of these forks were regularly merged back into the core UAE distribution.

The core UAE manual also provides configuration instructions for all the other operating systems that it supports. Studying the UAE manual gave me my second exposure to Linux. From the documentation, I learned that there is a command-line interface, and quite a few command-line utilities, such as: cat, ls, cp, gzip and bzip2.

The manual also regularly mixed the words "Linux" and "UNIX" which gave me quite a bit of confusion -- are they the same, or different? What is their relation?

Third exposure: real hands on experience


After managing to make DOS UAE run, it took a while before I got exposed to Linux again.

My third exposure to Linux was late 1999. A cousin started to study Computer Science and he was to first to show me what working with Linux was actually like in practice. I also got the opportunity to try it out several times myself. I still remember using old versions of Red Hat Linux and Corel Linux.

Using Linux for the first time was not a scary experience to me at all, including the command-line -- I was already familiar with the AmigaOS and MS-DOS command-line interfaces, and I already knew several Linux commands from studying the DOS UAE manual.

I was quite impressed by a number of things:

  • It was quite powerful in multi-tasking -- I could easily run many programs at the same time.
  • There was a command-line interface that felt decent and was more powerful (e.g. TAB-completion) compared to the MS-DOS command-line interface in Windows 95 that was somewhat treated as a second class citizen.
  • Native Linux filesystems (e.g. Ext2) have more abilities than the FAT32 file system in Windows 95: native long filenames and a notion of ownership and permissions.
  • As a result of a more powerful filesystem and its notion of ownership, everything was more secure. In particular, the fact that the root file system is owned by the root user and an unprivileged user only has write access to files in its own home directory was a huge improvement over Windows 95, 98, Me in which the user has full access to all files, including the operating system parts.
  • Many Linux distributions are quite modular. They provide package managers allowing you to easily install, upgrade and remove additional packages. You can also relatively easily deploy a stripped down system if you want. Windows 95 also had the option to enable/disable certain pieces, but even in its most basic form it was still bloated to me.
  • Graphical desktop environments looked decent. I tried both KDE and GNOME, and although they were not perfect, their look and feel was OK to me.
  • I could easily set up a server and provide services such as email, a web server and FTP.
  • Some well known commercial applications and games became available for Linux, such as Netscape, Real Player, Word Perfect, Quake 3 arena and Unreal Tournament. I remember that Quake 3 and Unreal Tournament ran pretty well in combination with my NVIDIA Riva TNT2 card.

I also gradually learned more about how Linux was developed -- Linus Torvalds started the Linux project while he was still a student at Helsinki university, but the software packages of a Linux distribution are developed by a larger movement:

  • The component that bears the name Linux is an operating system kernel -- not a full operating system. Typically most Linux systems are augmented with packages from the GNU project, such as GNU Bash, GNU Coreutils, GNU Texinfo etc. For this reason, the GNU project's opinion is that GNU/Linux is a more accurate name for Linux distributions.
  • Linus Torvalds leads the Linux project, but he is not doing all the development by himself -- in fact, there are many developers participating in the development of the kernel and other projects.
  • The goal of Linux and the GNU projects is to provide a free version of UNIX. The ideas that these packages implement have already been implemented in non-free/commercial UNIX operating systems.
  • Other pieces of a Linux distribution are developed by other communities. For example, both the KDE and GNOME desktops are developed by their own communities.
  • Most of the software packages that Linux distributions provide are free and open source software. The source code of these packages are available, you are free to study them, modify them and distribute your own (modified) copies.

    Back in the 90s and early 00s this was considered to be quite unconventional -- most well known software packages were proprietary software products for which the source code was kept private.

Fourth exposure: installing Linux myself


Somewhere in 2000 I took the decision to install Linux on my home computer, because I was convinced that it was relevant to regularly use. It was a challenge to get started -- I tried two Linux distributions: SuSE and Red Hat. With both distributions, I ran into a driver problem -- the Ultra ATA/66 controller to which my hard drive was attached was not supported yet.

After some time, I gave up and eventually attached my hard drive to the Ultra ATA/33 controller. Later on, I managed to find a kernel patch that adds a Ultra ATA/66 driver. I had to compile a patched kernel myself from source code.

While visiting kernel.org to obtain the Linux kernel source code, I discovered another interesting property of Linux: Linux is a portable operating system that runs on many hardware architectures in addition to the PC (with an Intel x86-compatible CPU).

I even noticed that it is possible to run Linux on an Amiga if you have model with a Motorola 68000-based CPU variant with an MMU: the 68020, 68030 and 68040 (non EC-variants). These CPUs were only included with the high-end Amiga models: the Amiga 2500, 3000 or 4000.

Back in the 90s, I only had an Amiga 500 that with the first generation 68000 CPU (lacking an MMU and FPU), so I knew it would not be possible to run Linux on it.

How to get started with Linux on Amiga?


Now that I finally have a Linux-capable Amiga 4000 in my possession (with a 68040 CPU with an MMU), I have decided to revisit that old idea to run Linux on the Amiga.

Getting started is a challenge. For PCs, there are plenty of Linux distributions available with plenty of advertising, but for the m68k there barely is.

I still remember from visiting old versions of the kernel homepage that there is a Linux/m68k homepage. It turns out that this website has not been updated in a very long time. Some links are broken and some functionality no longer works properly -- for example, I tried to register myself as a m68k Linux user but the registration form does not seem to work anymore.

The distributions page explains that there have been only three Linux distributions: an old unofficial port of Red Hat, Whiteline Linux/68k: an old Linux distribution for Atari STs in German and Debian. It turns out that Debian is the only actively developed distribution that still maintains an m68k port.

I know that the current versions of the Linux kernel still support m68k and that there are still people maintaining it. I have decided to do a search on the Internet to discover more about using modern versions of Linux on the Amiga.

The most recent discussion I could find was in this forum post on the English Amiga Board. Apparently, the same questions that I had were raised. The forum post links to an old post from 2013 that contains basic installation instructions from a Debian developer explaining how to install a test version of Debian (pre-Wheezy) on an Amiga hard drive (e.g. compact flash card) from a PC-based Linux host.

I tried the installation instructions, and they worked. However, I also found out that this test build of Debian did not work well on my Amiga 4000. Apparently, the instructions state that 64 MiB of fast RAM is the minimum (32 MiB may work, but it was not tested).

It turns out that the instructions were right -- my Amiga 4000 only has 48 MiB fast RAM. As a consequence, the Linux kernel boots and the initialization process starts, but once udev is called (a tool that loads device drivers), the kernel gives me all kinds of memory related errors. Half way, the boot process got completely stuck.

Selecting an appropriate Debian version


After running into the kernel out of memory issues, I realized that I had to make a choice -- either obtain all the required hardware upgrades or find an older Debian version that still works within the limits of the machine that I currently have.

I have been looking at various kinds of Debian versions. What I learned by diving into the history of Debian is that an m68k port was introduced with version 2.0. It remained one of the Debian ports until version 3.1 -- its successor: Debian 4.0 dropped m68k support (or at least: I could not find any disk images in the archive). The test version in the forum post was a pre-Wheezy (7.0) release. In Debian 9.x and later versions, the m68k port returned.

First, I tried the newest Debian port that I could find (12.0). The installation disc seems to provide an installer for the Amiga, but once the boot loader has loaded the kernel, my system freezes -- I got stuck with a gray colored screen. The same thing happened to me with versions 11.x, 10.x and 9.x.

I am not sure what the reason behind this stuck gray colored screen is. Maybe the Amiga version is broken and the other m68k platforms (e.g. Atari ST, classic Apple Macintosh) still work. It could also have something to do with increasing system resource demands, but I have no idea.

Then I tried older Debian distributions. The Debian 3.0 kernel seems to have problems detecting my hard drive -- it appears to have trouble with the fact that it is bigger than 4 GiB.

Debian 3.1 actually seems to boot up fine and it did not run out of memory. As a result, I have decided to pick that version.

Creating Debian 3.1 Sarge m68k ISO images


My Amiga 4000 does not have a network card. By default, Debian prefers to download packages from the Debian package repository over the Internet.

The only means I have to connect my Amiga to another machine is a null-modem cable, which is too slow to transfer large quantities of data, such as the packages for an entire Linux installation.

As result, I need to use old fashioned CD-ROM/DVD-ROMs. I learned that Debian 3.0 is the last version that offers downloadable ISO files for the entire distribution.

Although its successor: Debian 3.1 does not offer downloadable distribution ISOs (it does offer a NETBOOT image with a minimal system), you can still generate distribution ISOs with a tool called: Jigdo. I followed the instructions described in the Debian Jigdo HOWTO by downloading the required Jigdo files and running the following commands:

$ jigdo-lite debian-31r8-m68k-binary-1.jigdo
$ jigdo-lite debian-31r8-m68k-binary-2.jigdo
$ jigdo-lite debian-31r8-i386-binary-1.jigdo
$ jigdo-lite debian-31r8-i386-binary-2.jigdo

The above commands automatically download all required packages from the appropriate Debian mirrors and generate self-contained ISO images from them.

When jigdo asks me for a Debian mirror I provided:

http://archive.kernel.org/debian-archive/debian/

For legacy Debian distributions, it turns out that the packages are no longer available anymore from their original locations.

For DVD 2, there is one package that has a different checksum: zope-quotafolder_0.1.1-1_all.deb. I ignored the error -- it is a package I do not care about and I simply removed the .tmp suffix from the generated ISO file. The resulting ISO seems to work just fine.

After generating the two DVD ISO images, I have burned them on writable DVD-ROMs. Fortunately, I still have a blu-ray drive in my desktop PC that is capable of writing DVD discs.

Installing Debian 3.1 on the Amiga


I can install Debian on my Amiga by inserting the first DVD-ROM into the DVD-ROM drive of my Amiga and booting up the installer.

By opening the following directory in the Amiga Workbench: CD0:install/tools/amiga, we can find multiple executables:


Only two of the above executables are useful to me. The StartInstall icon boots up a Linux kernel using the framebuffer driver for the Amiga's OCS/ECS/AGA video chipset. The drawback of this installer is that driver's default setting is to use a "double NTSC" mode display (this mode is similar to ordinary NTSC, but it runs at twice the refresh rate). Because I have a PAL display that does not like double NTSC mode, the display looks messed up.

I can correct that problem by copying the StartInstall script and adding the video=amifb:pal kernel parameter to instruct the kernel to use an ordinary PAL mode at boot time.

There is another installer icon named: StartInstall_CV3D. This script instructs the kernel to use the Cybervision 64/3D frame buffer driver. I have decided to pick this installer for my installation, since I have that RTG card installed in my machine.

Installing Debian is relatively straight forward. I left some free space (+/- 5 GiB of the 32 GiB) at the end of my Amiga hard drive that already contains a Workbench 3.1 installation. I can use that free space for my Linux installation and store it next to my AmigaOS installation.

When the installer reaches the partitioning step, I have picked the "manual partitioning" option and added the following two partitions:

  • A swap partition of 128 MiB
  • The root file system partition (/) using the remaining available disk space. The root partition uses the Ext2 file system.

Installing packages takes a quite an amount of time on my Amiga -- uncompressing and installing packages is nowhere as fast as a modern machine. I did not exactly measure the full installation time, but it took several hours before the installation of the base system was completed.

Moreover, the installer works but it is quite slow and unresponsive. It seems that it is written in Perl and interpreting Perl scripts on my Amiga is significantly slower than running compiled executables that have been implemented in C. Sometimes it feels that the process is completely stuck, but by running ps in a second terminal, I discovered that the machine is actually doing a lot of hard work.

Configuring the boot process


The installer does not take care of configuring the Linux boot process on the Amiga. You need to set that up yourself.

Booting a Linux kernel is an interesting process. Although the kernel is the operating system component that interacts with the hardware and controls the system, the Linux kernel is not magically there in memory yet when you power up a computer -- it first needs to be loaded from external media into memory and then it needs to be started so that it can take control of the machine. A boot loader is an application that is typically responsible for this process.

There are various ways to load and start the Linux kernel. As a result, there are also various flavours of boot loaders.

(As a sidenote: I know that older versions of the Linux kernel (2.6.x and lower) on the x86 architecture can boot without a boot loader, as described in the Bootdisk HOWTO. Instead of using a boot loader, you can also write a kernel image to the Master Boot Record (MBR) of a disk drive.

The kernel image contains some bootstrap code to put the CPU in protected mode and starting the kernel. This feature is not used very frequently because it makes updating the kernel hard.)

Nowadays on PCs, it is common to load the Linux kernel as quickly as possible after booting up the machine (a process which I will call cold booting). LILO used to be amongst the first boot loaders to accommodate that -- it could load a selection of kernels from the hard drive with pre-configured parameters.

LILO was eventually succeeded by GRUB (one of its improvements is that it does not require an update when a new kernel image becomes available) and systemd-boot (meant for UEFI-based systems).

In the MS-DOS era, it was also possible to start a Linux kernel after having already booted into MS-DOS. Since MS-DOS is a relatively primitive operating system with no memory protection, this was easily possible -- LOADLIN is a DOS program that can load a kernel from an MS-DOS partition into memory and then start the kernel so that it can take over the system. Booting a kernel from a running existing operating system is a process that I will call warm booting.

On the Amiga, it turns out that warm booting Linux from AmigaOS is the preferred practice -- amiboot is an Amiga program that can load a Linux kernel into memory from AmigaOS and then start the Linux kernel so that it can take control of the system.

(As a sidenote: I also found traces of a package named: amiga-lilo. I guess the purpose of this package is to facilitate cold booting on the Amiga.

In theory, it should also be possible to mostly bypass the Amiga operating system by creating a custom boot block on a partition. This custom boot block starts a boot loader program. I guess the cold boot approach on the Amiga was never popular enough).

To set up the boot process for the Debian installation on my Amiga, I executed the following steps:

  • I have created a directory on my first AmigaOS partition: DH0:boot-debian and added a Workbench icon for the directory.
  • I have copied the amiboot program and supporting documentation files from the following folder of the first Debian installation DVD: CD0:install/tools/amiga to DH0:boot-debian.
  • I have copied the Linux kernel for the Amiga from the following location: CD0:install/kernels/vmlinuz-2.4.27-amiga to DH0:boot-debian
  • I have renamed the StartInstall_#? files to Start_#? because these scripts are no longer about starting the installer, but starting my Linux system.
  • I have modified the amiboot instruction of the Start script with the following parameters:
    amiboot-5.6 -d -k vmlinuz-2.4.27-amiga root=/dev/hda7 video=amifb:pal video=virge:off
        

    The above command invokes amiboot to load the Linux kernel from an image in the same directory with the following parameters:

    • The root partition points to the seventh partition of the hard-drive: /dev/hda7.
    • I have configured the Amiga framebuffer to start in PAL mode, rather than "double NTSC" which is the default. Double NTSC mode messes up my display.
    • I have disabled the S3 Virge driver (the video chipset on my Cybergraphics 64/3D card), because it gives a division by zero exception in the kernel when I boot it.
  • I have modified the amiboot instruction of the Start_CV3D script with mostly the same adjustments:
    amiboot-5.6 -d -k vmlinuz-2.4.27-amiga root=/dev/hda7 video=virge:640x480-8
      

    The only difference is that the above command instructs the kernel to use my Cybervision 64/3D card using the 640x480 resolution and an 8-bit color depth.
  • I did a backdrop of the Start and Start_CV3D icons (by selecting the icons, and then picking 'Icon -> Leave out' in the menu) so that I can boot up Linux conveniently from the desktop:


Clicking on the Start icon gives me the following boot up screen:


Completing the Debian installation


After booting up my Linux installation, the Debian installer resumes the installation process. It asks me to configure my timezone, hostname, the package manager (by scanning the two installation DVDs), an unprivileged user account and so on. This is generally a straight forward, but slow process (due to the fact that the installer is a Perl script).

Some use cases


After completing the installation process described earlier, my Amiga-based Linux system is ready to be used. I tried a number of use cases.

Controlling the frame buffer


Previously, I have shown that it is possible to change the settings of the framebuffer at boot time with the video= kernel parameter (such as PAL/NTSC mode, color depth and resolutions). It is also possible to switch these settings at run-time by using the fbset utility.

fbset can be installed as follows:

$ apt-get install fbset

To be able to properly use fbset you need video configurations in the /etc/fb.modes configuration file. It turns out that the default installation does not provide the settings that you need to work with the Amiga's OCS/ECS/AGA video chipsets.

Fortunately, by looking up the corresponding source code, I could find a modes file that provides the settings that I need: fb.modes.PAL. I have replaced the default fb.modes file with this file.

By installing this configuration file, I can switch to interlaced mode by running:

$ fbset pal-lace


As shown in the picture above, running the above command doubles the amount of scanlines on my screen (at the expense of a flickering screen).

I can switch back to normal PAL mode by running:

$ fbset pal

When using my Cybervision 64/3D card, I also want to have the ability to switch resolutions and color modes at runtime. I could not find a preconfigured fb.modes file for my RTG card to do that.

To obtain the required framebuffer configuration settings, I followed a silly procedure. I ended up booting the kernel in a specific video mode, and then saving the framebuffer settings by running:

$ fbset >> /etc/fb.modes

and then rebooting and switching screen modes until all available modes have been covered. I repeated the procedure for the following kernel video parameters:

virge:640x480-8
virge:800x600-8
virge:1024x768-8
virge:1280x1024-8
virge:1600x1200-8
virge:640x480-16
virge:800x600-16
virge:1024x768-16

When capturing the configuration, the resulting configuration name does not take the color depth into account. For example, when capturing the 640x480-8 configuration, fbset generates a mode that is named 640x480-50 in which the -50 component refers to the refresh rate.

I ended up changing the configuration names to use a naming convention that consists of <width>x<height>x<colorDepth> which is similar to the kernel video parameters shown earlier.

After capturing all screen modes, I can switch between them at runtime. For example, the following command switches to a 1024x768 using an 8-bit color depth:

$ fbset 1024x768-8


As can be seen in the picture above, the resolution has changed from 640x480 to 1024x768.

The X Window System


After playing around with the framebuffer. I have also decided to give the X Window System a try.

Since X11 applications are quite resource demanding, I have decided to do a very minimal X Window System installation. Based on instructions from the following page (they were outdated, so I looked for the equivalent set of packages in Debian 3.1), I installed the following set of packages to produce a very small X11 installation:

$ apt-get install xfonts-base xfree86-common xlibs xserver-common \
    xserver-xfree86 xbase-clients

While installing the above packages, the xserver-xfree86 maintainer script asks me to provide a number of configuration settings. I used the following values:

  • Select desired X server driver: fbdev
  • Use kernel framebuffer device interface? yes
  • XKB rule to use: xfree86
  • Select keyboard model: amiga
  • Keyboard layout: us
  • Mouse device: /dev/amigamouse
  • Is your monitor an LCD device? No
  • Method for selecting your monitor characteristics? simple
  • Monitor size: 17 inch
  • Video mode to use: 640x480
  • Default color depth in bits: 8

After trying to start the X Window System, I have noticed that it crashes on startup while loading certain modules. I fixed the startup procedure by opening the /etc/X11/XF86Config-4 file in a text editor and disabling the problematic modules.

OpenGL is not required, and probably will not work on the Amiga, because of the lack of system resources. As a result, I can disable the following modules by commenting them out:

# Load "GLcore"
# Load "dri"
# Load "glx"

The following module can also be disabled. It is not needed because it is used to make a BIOS interrupt call on 80x86 systems:

# Load "int10"

I also figured out that the keyboard does not work properly with XKB and needs to be disabled. I can disable XKB altogether by commenting out the following options:

# Option "XkbRules" ...
# Option "XkbModel" ...
# Option "XkbLayout" ...

And adding the following property:

Option "XkbDisable"

(As a sidenote: although disabling XKB mostly solved my problems, I noticed that I could not type uppercase letters by holding any of the shift keys. After experimenting a bit with the xev tool I learned that the shift keys are incorrectly mapped to the Alt keys. If I hold any of the Alt keys, then I can type uppercase letters). I do not yet have a workaround for this, but I can live with the problem by using the Alt keys.)

I have also installed TWM as window manager and xterm as a terminal application:

$ apt-get install twm xterm

I can start the X Window System from the terminal by running:

$ startx

Resulting in the following graphical environment:


The X Window System works fine in combination with my Cybervision 64/3D card. The only thing that remains a mystery to me is whether it is possible to use the X Window System in combination with the AGA chipset -- it always results in a segmentation fault in the startup procedure.

Using the GoTek floppy emulator


Similar to Linux on PCs, Linux on the Amiga can also work with floppy disks and a variety of file systems. For example, it knows how to read and write to floppy disks using Amiga's Fast File System and MS-DOS' FAT file system.

As I already explained in previous blog posts, I have a GoTek floppy emulator as an additional floppy drive. The GoTek floppy emulator uses disk images from a USB memory stick rather than real floppy disks. The GoTek drive can be attached to the external floppy port and is mapped to the DF2: drive.

To use the DF2: drive in Linux, I need to create additional device files (/dev/fd2 etc.). This can be done by running the following commands:

$ cd /dev
$ ./MAKEDEV fd2

I am using the following entries in the /etc/fstab file to mount floppy drives:

/dev/fd0    /media/floppy0  auto    rw,user,noauto    0 0
/dev/fd1    /media/floppy1  auto    rw,user,noauto    0 0
/dev/fd2    /media/floppy2  auto    rw,user,noauto    0 0

Of course, I must also make sure that the mount point directories exist. I can create them by running:

$ mkdir /media/floppy0
$ mkdir /media/floppy1
$ mkdir /media/floppy2

For example, I can mount a virtual Amiga floppy "inserted" into the GoTek drive, such as the Workbench disk, by running the following command:

$ mount /media/flopppy2

Then I can get access to the floppy disk's contents by opening the /media/floppy2 directory.

Setting up a terminal connection between the Amiga and PC with a null-modem cable


Similar to connecting my Amiga 4000 (running AmigaOS) to my Linux PC, I can also set up a terminal connection between my Linux PC and Amiga Linux installation with a null-modem cable.

For example, I can turn my desktop PC (running NixOS) into a terminal server by running the following command as root user:

$ agetty --flow-control ttyUSB0 19200

The above command exposes a terminal session over the USB to RS232 port, using hardware (RTS/CTS) flow control and a baud rate of 19200 bits per second.

I can connect with minicom from my Amiga 4000 to remotely administer my desktop PC and exchange files using the ZMODEM protocol.

I can also do the opposite. With the following command (as root user) on my Amiga 4000 Linux installation, I can turn it into a terminal server:

$ getty -h 19200 /dev/ttyS0

Then I can use minicom from my desktop PC to connect to the Amiga:

$ minicom -b 19200 -D /dev/ttyUSB0

The result of this linking up process can be seen in this picture:


As may be observed, my laptop on the right uses minicom to open up a shell session on my Amiga 4000 machine.

Connecting to the Internet


Another nice property of Linux is that has builtin support for the Internet protocol stack. (As a sidenote: Internet connectivity is also possible on AmigaOS, but you need to install separate software for that).

In addition to a terminal connection, I can also set up a PPP link between my Amiga and desktop PC over the null-modem cable so that I can use the Internet protocols to connect between them. My desktop PC is supposed to have 192.168.1.1 as an IP address and my Amiga 4000 192.168.1.2. I took inspiration from the PPP HOWTO, which is a bit outdated.

First, I need to set up a link end point on my Amiga 4000, with the following command:

$ pppd -detach crtscts lock noauth defaultroute 192.168.1.2:192.168.1.1 /dev/ttyS0 19200

Then I can configure my desktop PC (which has a connection to the Internet by using an ethernet card):

$ pppd -detach crtscts lock noauth proxyarp 192.168.1.1:192.168.1.2 /dev/ttyUSB0 19200

Then I should be able to ping my desktop PC from the Amiga by running:

$ ping 192.168.1.1

With some additional steps, I can also connect my Amiga 4000 to the Internet by using my desktop PC as a gateway.

First, I need to enable IP forwarding on my desktop PC:

echo 1 > /proc/sys/net/ipv4/ip_forward

Then, on my desktop PC, I can enable network address translation (NAT) as follows:

INTERNAL_INTERFACE_ID="ppp0"
EXTERNAL_INTERFACE_ID="enp6s0"

iptables -t nat -A POSTROUTING -o $EXTERNAL_INTERFACE_ID -j MASQUERADE
iptables -A FORWARD -i $EXTERNAL_INTERFACE_ID -o $INTERNAL_INTERFACE_ID -m state --state RELATED,ESTABLISHED -j ACCEPT
iptables -A FORWARD -i $INTERNAL_INTERFACE_ID -o $EXTERNAL_INTERFACE_ID -j ACCEPT

In the above example: ppp0 refers to the PPP link interface and enp6s0 to the ethernet interface that is connected to the Internet.

In order to resolve domain names on the Amiga 4000, I need to copy the nameserver settings from the /etc/resolv.conf file of the desktop PC to the Amiga 4000.

Then I can, for example, use Lynx to visit my homepage:


Visiting Internet sites is not particularly fast over a null-modem cable (with a baud rate of 19200 bits per second) but it is possible. :)

Exchanging files


Sometimes it is also required to exchange files from and to my Linux installation on the Amiga 4000, such as software packages from the Internet. There are various ways to accomplish that.

Exchanging files with the memory card on my Linux PC


In addition to using a null-modem cable, which is slow because it has a baud rate of 19200 bits per second, I can also simply just take the Compact Flash card from the CF2IDE device and put it in the card reader of my PC.

An Ext2 partition on the Amiga is no different than an Ext2 partition on the PC. The only challenge is that we need to address it somehow -- Linux on my PC is not able to understand an RDB (Rigid Disk Block) partition table (the partitioning format that the Amiga uses) -- PCs use a different partitioning format.

There is a way to cope with this. If in a file (e.g. a hard disk image or device file referring to a hard drive) we know the offset and length of a partition, then we can use a loopback device to mount it.

GNU Parted is capable of reading an RDB partition table:

parted /dev/sdb
unit B
print
Model: Generic- USB3.0 CRW-CF/MD (scsi)
Disk /dev/sdb: 32019111936B
Sector size (logical/physical): 512B/512B
Partition Table: amiga
Disk Flags: 

Number  Start         End           Size          File system     Name  Flags
 1      1806336B      2149539839B   2147733504B   asfs            DH0   boot
 2      2149539840B   4297273343B   2147733504B   asfs            DH1
 3      4297273344B   6445006847B   2147733504B   asfs            DH2
 4      6445006848B   15090130943B  8645124096B   asfs            DH3
 5      15090130944B  25891117055B  10800986112B  asfs            DH4
 6      25891117056B  26019366911B  128249856B    linux-swap(v1)  DH5
 7      26019366912B  32019111935B  5999745024B   ext2            DH6
quit

In the above code fragment, I started GNU parted to read the partition table of my Amiga drive (/dev/sdb), switched the units to bytes, and then I printed the partition table. The last partition entry (Number: 7) refers to the Linux Ext2 partition on my Amiga 4000.

I can use the start offset and size fields in the above table to configure a loopback device (/dev/loop0) referring to my Amiga drive's Linux partition from my Amiga drive's compact flash card:

$ losetup --offset 26019366912 --sizelimit 5999745024 /dev/loop0 /dev/sdb

Then I can mount the partition (through the loopback device file) to a directory:

$ mount /dev/loop0 /mnt/amiga-linux-partition

And then I can exchange files to the Amiga's Linux partition by visiting /mnt/amiga-linux-partition.

When the work is done, I must unmount the partition and detach the loopback device:

$ umount /mnt/amiga-linux-partition
$ losetup -d /dev/loop0

Exchanging files between the AmigaOS and Linux operating systems


I have two operating systems running on my Amiga 4000. Another relevant use case is the ability to exchange files between the AmigaOS and Linux operating systems on the Amiga 4000.

As I already explained, the Linux kernel supports reading and writing Amiga Fast File system partitions. For example, if one of my hard-drive partitions would have been formatted using Amiga's Fast File system, then I can simply mount it at boot time by adding the following entry to /etc/fstab:

/dev/hda1    /mnt/harddisk    affs    defaults    0 0

Unfortunately, because of my hard-drive size (which is much bigger than 4 GiB) I have picked Smart Filesystem (SFS) over Amiga's Fast Filesystem for my Amiga partitions. It seems that a Linux kernel module for SFS has been developed, but it was never accepted into the upstream Linux kernel and its development seems to have stopped a long time ago. As a result, there is no means for me to read my AmigaOS partitions from Linux.

Fortunately, I can do the opposite -- it is possible to read and write to a Linux Ext2 partition from AmigaOS: there is an ext2fs filesystem handler for AmigaOS.

Installing it consists of three steps:

  • We must extract the contents of the lha file into a temp directory
  • Copy the AmigaOS/Ext2FileSystem handler to L:
  • Create a DEVS:DOSDrivers entry specifying mount settings of our Linux Ext2 partition.

Writing the DOSDriver file for the Ext2 partition is tricky -- the ext2fs package suggests to use a tool: GiggleDisk to automatically generate a mount list. This tool can be used to mostly derive the configuration properties from the RDB partition table.

I ran into an annoying problem with GiggleDisk -- when I run it, it stops with an "Invalid RDB header" error. Some experimentation revealed that it is the Ext2 and swap partitions that it does not like. If I remove the Linux partitions, then GiggleDisk is able to generate a mount list for all the Amiga partitions.

As a consequence, my recommendation is to run GiggleDisk before you generate the Linux partitions and keep the corresponding mount list stored for future use. Before installing Linux you need to install GiggleDisk and run the following command:

GiggleDisk DEVICE scsi.device UNIT 0 TO DH0:T

The above command examines the first drive on the SCSI bus and writes the mount list entries to following directory: DH0:T.

For example, for my first hard drive partition, GiggleDisk generated the following DOSDriver file (DH0:T/DH0):

/*
** DosDriver automatically created by GiggleDisk
**
** GiggleDisk (c)2005 Guido Mersmann
**
*/

FileSystem       = df2:l/SmartFilesystem
Device           = scsi.device
Unit             = 0
BlockSize        = 512
Surfaces         = 7
SectorsPerBlock  = 2
BlocksPerTrack   = 252
Reserved         = 2
PreAlloc         = 0
Interleave       = 0
MaxTransfer      = 0x0001FE00
Mask             = 0x7FFFFFFE
LowCyl           = 2
HighCyl          = 2412
Buffers          = 80
BufMemType       = 0
StackSize        = 16384
Priority         = 0
GlobVec          = -1
DosType          = 0x43465300
Activate         = 1
Mount            = 1
/* Bootable      = TRUE */

Fortunately, most of the properties of the mount list entries are the same for all partitions. The only differences we have between the partitions are:

  • The FileSystem and DosType fields.
  • The location of the partition on the hard drive, defined by the LowCyl and HighCyl properties.

By studying the documentation of the ext2fs package, using the information of GNU Parted (shown in the previous section) and some math, I can derive the configuration settings for the Ext2 partition from the existing partitions' configurations.

First, I need to make a copy of the DH0 file, naming it EXT6 -- EXT6: means the Ext2 filesystem device equivalent for the partition DH6:. Then I change the following two fields so that the operating system knows that it needs to be treated as an Ext2 file system partition:

FileSystem = DH0:L/Ext2FileSystem
DosType = 0x45585432

Then we must compute the LowCyl and HighCyl values. In the previous section, we have already requested the offsets (in bytes) of all partitions by running GNU Parted. We can use these offsets to derive the LowCyl and HighCyl properties by doing some math.

First, I must compute the amount of blocks per cylinder. This value can be computed with the following formula:

blocksPerCylinder = heads * sectors

We can map the variables in the above formula to properties shown in the previous mount entry:

  • heads corresponds to Surfaces
  • sectors corresponds to BlocksPerTrack

In our situation this results in:

blocksPerCylinder = 7 * 252 = 1764

From the number of blocks per cylinder I can derive the amount of bytes per cylinder with the following formula:

bytesPerCylinder = blocksPerCylinder * BlockSize

By filling in the BlockSize value in the config file this results in:

bytesPerCylinder = 1764 * 512 = 903168

With the above value I can derive the low cylinder with the following formula:

LowCyl = Start / bytesPerCylinder

By filling in the start offset (in bytes) of the Linux partition from the GNU Parted output, this results in:

LowCyl = 26019366912 / 903168 = 28809

I can apply the same value to also compute the size in cylinders:

sizeInCylinders = Size / bytesPerCylinder 
  = 5999745024 / 903168
  = 6643

The high cylinder value can be computed as follows:

HighCyl = LowCyl + sizeInCylinders - 1
  = 28809 + 6643 - 1
  = 35451

(As a sidenote: we need to subtract 1 because the start cylinder is taken into account with the size)

By updating the mount file with the above LowCyl and HighCyl values, I have filled in all required configuration properties.

Unfortunately, I learned that providing the correct settings is not enough. There is another small problem -- it turns out that the Ext2 file system driver is also constrained by the SCSI driver's 4 GiB limitation. I learned from the ext2fs README that it is possible to escape that limit by installing a program called: td64patch. td64patch is a program that needs to run in the background.

Although this program does the job, I do not like to start it as part of the Startup-Sequence because I do not permanently need it. As an alternative solution, I created a mount script (MountEXT6):

Run C:td64patch DEVICE scsi.device
C:Mount DH0:Storage/DOSDrivers/EXT6

The above script does two things:

  • It starts the td64patch program in the background for bypassing the limits of AmigaOS' scsi.device driver
  • Then it mounts the EXT6: drive using the mount configuration that we have created earlier.

I also created an icon for the above script, using C:IconX as a default tool and did a backdrop so that I can conveniently start it from the desktop when I need it:


The screenshot above shows the result of clicking on the MountEXT6 icon. The EXT6: drive gets mounted and I can explore its contents in the Amiga Workbench.

Running Linux on Amiga in FS-UAE


Another thing I was curious about is whether I could run Linux for Amiga in FS-UAE, an Amiga emulator.

Having the ability to use an emulator is useful for experimentation. Moreover, UAE does not use cycle exact emulation for 68020 processors and later models. Instead, it emulates as fast as possible. As a result, on my modern desktop PC an emulated Amiga 4000 runs much faster than my real Amiga 4000. For experimentation with Linux, e.g. building packages from source code, this greater speed is quite convenient.

It turns out that running Linux in FS-UAE is actually possible, but we need to enable certain settings for that.

The biggest impediment to run Linux in a UAE is how UAE normally "emulates" hard-drives and CD-ROM drives. In fact, FS-UAE does not really emulate them, but it provides its own AmigaOS replacement drivers: uaehf.device and uaescsi.device that interface with the host filesystem/device drivers. Linux does not work with AmigaOS device drivers -- once the kernel is started, it wants to take control of the hardware itself.

As an alternative, it is also possible to emulate IDE controllers. When IDE emulation is enabled, AmigaOS uses its own scsi.device driver to interact with the storage devices. Linux can control the IDE controllers by itself.

For a hard drive, we must create a hard file (mounting a directory from host file system relies on using uaehf.device) and specify an IDE controller. We can do that by adding the following properties to an FS-UAE configuration file:

hard_drive_0 = mydrive.hdf
hard_drive_0_controller = ide
hard_drive_0_type = rdb

In the above code fragment, hard drive 0 uses mydrive.hdf as a hardfile, use an IDE controller named: ide and the type property states that the hard file contains an RDB partition table, not a single partition.

The last property is only needed when the hard file is still empty. After the partitioning is done, FS-UAE is able to detect the hard file type automatically.

For the CD-ROM drive, we also need to enable an IDE controller:

cdrom_drive_0_controller = ide1

After configuring the IDE controllers, we should be able to install Debian in FS-UAE on the hard-drive image.

I have noticed that emulating an IDE controller in combination with an emulated CD-ROM is not perfect. Sometimes I/O access becomes very slow in AmigaOS.

While installing Debian from the DVD-ROMs, I have noticed that during the package installation process I sometimes run into read errors.

Fortunately, I can cope with that by executing a shell session from the Debian installer and remounting the CD-ROM drive:

umount /cdrom
# Eject the CD-ROM and reinsert it again with FS-UAE (F12)
mount /dev/cdroms/cdrom0 /cdrom
exit

And then resuming the installation where I left off. After a couple of tries, the installation should succeed.

The result is that I can run Linux conveniently in FS-UAE:


The above screenshot shows my NixOS Linux system (running on an x64 CPU) running FS-UAE that runs Debian Linux for m68k. Isn't it cool?

Similar to the memory card of my Amiga 500's SCSI2SD device, I can also put the Compact Flash card of my Amiga 4000 in the card reader of my PC and then run its Linux installation in FS-UAE.

To do that I need to change the hard drive setting to use the device file that corresponds to my card reader:

hard_drive_0 = /dev/sdb

In the above code fragment: /dev/sdb corresponds to the device file representing the card reader. I also need to make sure that the device file is accessible by an unprivileged user by giving it public permissions. I need to run the following command as a root user to do that:

$ chmod 666 /dev/sdb

Conclusion


In this blog post, I have described how I have been using Linux on my Amiga 4000. I hope this information can be of use to anyone who is planning to run Linux on their Amigas. Furthermore, I hope that the existing documentation on the Linux/m68k homepage gets updated at some point. May be the information in this blog post can help with that.

Debian 3.1 works decently for me, but everything is much slower compared to a PC. This is not really surprising if you run an operating system (last updated in 2008) on a CPU from the early 90s that still runs at a 25 MHz clock speed :).

Most command-line utilities (that have been written in C) work at an acceptable speed, but applications such as Perl scripts or the X Window System are generally quite slow.

I have also noticed that the amount of system resources that the Linux kernel needs grows with each newer version. Even for the Amiga, an obsolete hardware platform, it is possible to address these higher system demands by, for example, buying an accelerator card with a substantially faster CPU (e.g. a 68060 @ 100 MHz) and substantially more RAM (e.g. 512 MiB of fast RAM).

Although an accelerator card may give my Amiga a huge performance boost, I do not want to implement such big upgrades -- the reason why I like to tinker with my Amiga is because it is a limited machine. I use it for nostalgic and creative reasons, such as developing software that fit within the boundaries of the machine.

I did buy a modest upgrade to my Amiga 4000 machine though -- my Fastlane Z3 expansion card still has room for an additional 32 MiB of fast RAM. I have decided to buy an extra 16 MiB increasing the amount of my Amiga's fast RAM from 48 MiB to 64 MiB.

I highly appreciate Debian's efforts to maintain uncommon ports of Linux and the GNU system. From a commercial point of view, I believe there is little motivation to keep the m68k port alive, but it is still good to see that a community-driven project, such as Debian, still does the effort.

I also got motivated to see if I can run some of my own software under Linux on the Amiga 4000. An obvious candidate would be the packages from my IFF file format experiments project. I need to find more spare time to see if I can actually do it. :)

Another thing that I expect people (who know me a bit better from my Linux background) to ask me is when I will deliver a port of the Nix package manager and the Linux distribution that is built around it: NixOS to m68k-linux. I have not made any plans yet, but you will never know -- these tools are instrumental in my personal software construction process and I have already done an interesting Amiga crossover with these tools in the past. :)