Friday, December 30, 2022

Blog reflection over 2022

Today, it is my blog's anniversary. As usual, this is a nice opportunity to reflect over the last year.

Eelco Visser


The most shocking event of this year is the unfortunate passing of my former PhD supervisor: Eelco Visser. I still find it hard to believe that he is gone.

Although I left the university for quite some time now, the things I learned while I was employed at the university (such as having all these nice technical discussions with him) still have a profound impact on me today. Moreover, without his suggestion this blog would probably not exist.

Because the original purpose of my blog was to augment my research with extra details and practical information, I wrote a blog post with some personal anecdotes about him.

COVID-19 pandemic


In my previous blog reflection, I have explained that we were in the third-wave of the COVID pandemic caused by the even more contagious Omicron variant of the COVID-19 virus. Fortunately, it turned out that, despite being more contagious, this variant is less hostile than the previous Delta variant.

Several weeks later, the situation got under control and things were opened up again. The situation remained pretty stable afterwards. This year, it was possible for me to travel again and to go to physical concerts, which feels a bit weird after staying home for two whole years.

The COVID-19 virus is not gone, but the situation is under control in Western Europe and the United States. There have not been any lockdowns or serious capacity problems in the hospitals.

When the COVID-19 pandemic started, my employer: Mendix adopted a work-from-home-first culture. By default, people work from home and if they need to go to the office (for example, to collaborate) they need to make a desk reservation.

As of today, I am still working from home most of my time. I typically visit the office only once a week, and I use that time to collaborate with people. In the remaining days, I focus myself on development work as much as possible.

I have to admit that I like the quietness at home -- not everything can be done at home, but for programming tasks I need to think, and for thinking I need silence. Before the COVID-19 pandemic started, the office was typically very noisy making it sometimes difficult for me to focus.

Learning modern JavaScript features


I used to intensively work with JavaScript at my previous employer: Conference Compass, but since I joined Mendix I am mostly using different kinds of technologies. During my CC days, I was still mostly writing old fashioned (ES5) JavaScript code, and I still wanted to familiarise myself with modern ES6 features.

One of the challenging aspects of using JavaScript is asynchronous programming -- making sure that the main thread of your JavaScript application never blocks too long (so that it can handle multiple connections or input events) and keeping your code structured.

With old fashioned ES5 JavaScript code, I had to rely on software abstractions to keep my code structured, but with the addition of Promises/A+ and the async/await concepts to the core of the JavaScript language, this can be done in a much cleaner way without using any custom software abstractions.

In 2014, I wrote a blog post about the problematic synchronous programming concepts in JavaScript and their equivalent asynchronous function abstractions. This year, I wrote a follow-up blog post about the ES6 concepts that I should use (rather than software abstractions).

To motivate myself learning about ES6 concepts, I needed a practical use case -- I have ported the layout component of my web framework (for which a Java and PHP version already exist) to JavaScript using modern ES6 features, such as async/await, classes and modules.

An interesting property of the JavaScript version is that it can be used both on the server-side (as a Node.js application) and client-side (directly in the browser by dynamically updating the DOM). The Java and PHP versions only work server-side.

Fun projects


In earlier blog reflections I have also decided to spend more time on useless fun projects.

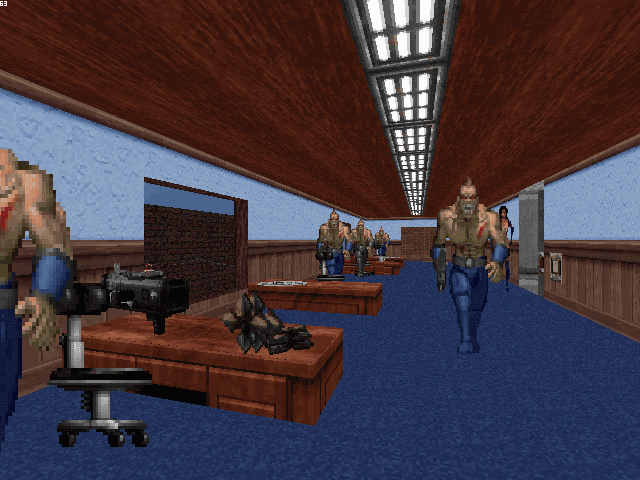
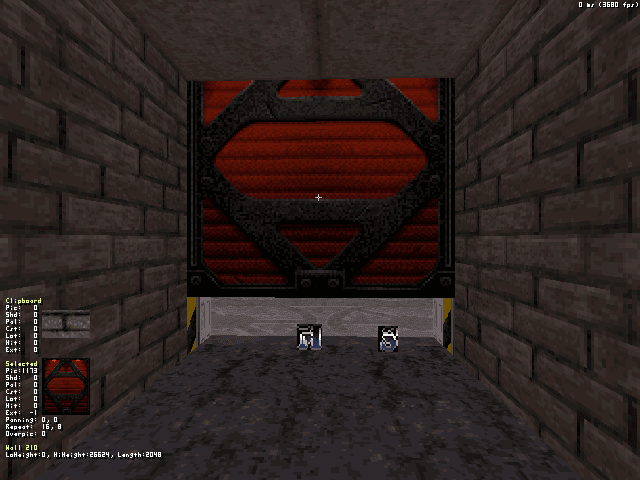
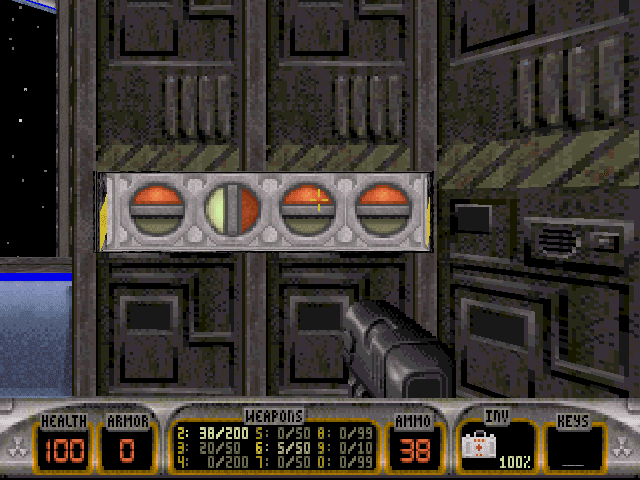
In the summer of 2021, when I decided not to do any traveling, I had lots of time left to tinker with all kinds of weird things. One of my hobby projects was to play around with my custom maps for Duke3D and Shadow Warrior that I created while I was still a teenager.

While playing with these maps, I noticed a number of interesting commonalities and differences between Duke3D and Shadow Warrior.

Although both games use the same game engine: the BUILD-engine, their game mechanics are completely different. As an exercise, I have ported one of my Duke3D maps to Shadow Warrior and wrote a blog post about the process, including a description of some of their different game mechanics.

Although I did the majority of the work already back in 2021, I have found some remaining free time in 2022 to finally finish the project.

Web framework improvements


This year, I have also intensively worked on improving several aspects of my own web framework. My custom web framework is an old project that I started in 2004 and many parts of it have been rewritten several times.

I am not actively working on it anymore, but once in a while I still do some development work, because it is still in use by a couple of web sites, including the web site of my musical society.

One of my goals is to improve the user experience of the musical society web site on mobile devices, such as phones and tablets. This particular area was already problematic for years. Despite making the promise to all kinds of people to fix this, it took me several years to actually take that step. :-).

To improve the user experience for mobile devices, I wanted to convert the layout to a flexbox layout, for which I needed to extend my layout framework because it does not generate nested divs.

I have managed to improve my layout framework to support flexbox layouts. In addition, I have also made many additional improvements. I wrote a blog post with a summary of all my feature changes.

Nix-related work


In 2022, I also did Nix-related work, but I have not written any Nix-related blog posts this year. Moreover, 2022 is also the first time since the end of the pandemic that a physical NixCon was held -- unfortunately, I have decided not to attend it.

The fact that I did not write any Nix-related blog posts is quite exceptional. Since 2010, the majority of my blog posts are Nix-related and about software deployment challenges in general. So far, it has never happened that there has been an entire year without any Nix-related blog posts. I think I need to explain a thing or two about what has happened.

This year, it was very difficult for me to find the energy to undertake any major Nix developments. Several things have contributed to that, but the biggest take-away is that I have to find the right balance.

The reason why I got so extremely out of balance is that I do most of my Nix-related work in my spare time. Moreover, my primary motivation to do Nix-related work is because of idealistic reasons -- I still genuinely believe that we can automate the deployment of complex systems in a much better way than the conventional tools that people currently use.

Some of the work for Nix and NixOS is relatively straight forward -- sometimes, we need to package new software, sometimes a package or NixOS service needs to be updated, or sometimes broken features need to be fixed or improved. This process is often challenging, but still relatively straight forward.

There are also quite a few major challenges in the Nix project, for which no trivial solutions exist. These are problem areas that cannot be solved with quick fixes and require fundamental redesigns. Solving these fundamental problems is quite challenging and typically require me to dedicate a significant amount of my free time.

Unfortunately, due to the fact that most of my work is done in my spare time, and I cannot multi-task, I can only work on one major problem area at the time.

For example, I am quite happy with my last major development project: the Nix process management framework. It has all features implemented that I want/need to consistently eat my own dogfood. It is IMHO a pretty decent solution for use cases where most conventional developers would normally use Docker/docker-compose for.

Unfortunately, to reach all my objectives I had to pay a huge price -- I have published the first implementation of the process management framework already in 2019, and all my major objectives were reached in the middle of 2021. As a consequence, I have spend nearly two years of my spare time only working on the implementation of this framework, without having the option to switch to something else. For the first six months, I remained motivated, but slowly I ran into motivational problems.

In this two-year time period, there were lots of problems appearing in other projects I used to be involved in. I could not get these projects fixed, because these projects also ran into fundamental problems requiring major redesigns/revisions. This resulted in a number of problems with members in the Nix community.

As a result, I got the feeling the I lost control. Moreover, doing anything Nix-related work also gave (and in some extent still gives) me a lot of negative energy.

Next year, I intend to return and I will look into addressing my issues. I am thinking about the following steps:

  • Leaving the solution of some major problem areas to others. One of such areas is NPM package deployments with Nix. node2nix's was probably a great tool in combination with older versions of NPM, but its design has reached the boundaries of what is possible already years ago.

    As a result, node2nix does not support the new features of NPM and does not solve the package scalability issues in Nixpkgs. It is also not possible to properly support these use cases by implementing "quick fixes". To cope with these major challenges and keep the solution maintainable, a new design is needed.

    I have already explained my ideas on the Discourse mailing list and outlined what such a new design could look like. Fortunately, there are already some good initiatives started to address these challenges.
  • Building prototypes and integrate the ideas into Nixpkgs rather than starting an independent project/tool that attracts a sub community.

    I have implemented the Nix process management framework as a prototype with the idea to show how certain concepts work, rather than advertising the project as a new solution.

    My goal is to write an RFC to make sure that these ideas get integrated into the upstream Nixpkgs, so that it can be maintained by the community and everybody can benefit from it.

    The only thing I still need to do is write that RFC. This should probably be one of my top priorities next year.
  • Move certain things out of Nixpkgs. The Nixpkgs project is a huge project with several thousands of packages and services, making it quite a challenge to maintain and implement fundamental changes.

    One of the side effects of its scale is that the Nixpkgs issue tracker is a good as useless. There are thousands of open issues and it is impossible to properly track the status of individual aspects in the Nixpkgs repository.

    Thanks to Nix flakes, which unfortunately is still an experimental feature, we should be able to move certain non-essential things out of Nixpkgs and conveniently deploy them from external repositories. I have some things that I could move out of the Nixpkgs repository when flakes have become a mainstream feature.
  • Better communication about the context in which something is developed. When I was younger, I always used to advertise a new project as the next great thing that everybody should use -- these days, I am more conservative about the state of my projects and I typically try to warn people upfront that something is just a prototype and not yet ready for production use.

Blog posts


In my previous reflection blog posts, I always used to reflect over my overall top 10 of most popular blog posts. There are no serious changes compared to last year, so I will not elaborate about them. The fact that I have not been so active on my blog this year has probably contributed that.

Concluding remarks


Next year I will look into addressing my issues with Nix development. I hope to return to my software deployment/Nix-related work next year!

The final thing I would like to say is:


HAPPY NEW YEAR!!!

A summary of my layout framework improvements

It has been quiet for a while on my blog. In the last couple of months, I have been improving my personal web application framework, after several years of inactivity.

The reason why I became motivated to work on it again, is because I wanted to improve the website of the musical society that I am a member of. This website is still one of the few consumers of my personal web framework.

One of the areas for improvement is the user experience on mobile devices, such as phones and tablets.

To make these improvements possible, I wanted to get rid of complex legacy functionality, such as the "One True Layout" method, that heavily relies on all kinds of interesting hacks that are no longer required in modern browsers. Instead, I wanted to use a flexbox layout that is much more suitable for implementing the layout aspects that I need.

As I have already explained in previous blog posts, my web application framework is not monolithic -- it consists of multiple components each addressing a specific concern. These components can be used and deployed independently.

The most well-explored component is the layout framework that addresses the layout concern. It generates pages from a high-level application model that defines common layout aspects of an application and the pages of which an application consists including their unique content parts.

I have created multiple implementations of this framework in three different programming languages: Java, PHP, and JavaScript.

In this blog post, I will give a summary of all the recent improvements that I made to the layout framework.

Background


As I have already explained in previous blog posts, the layout framework is very straight forward to use. As a developer, you need to specify a high-level application model and invoke a view function to render a sub page belonging to the application. The layout framework uses the path components in a URL to determine which sub page has been selected.

The following code fragment shows an application model for a trivial test web application:

use SBLayout\Model\Application;
use SBLayout\Model\Page\StaticContentPage;
use SBLayout\Model\Page\Content\Contents;
use SBLayout\Model\Section\ContentsSection;
use SBLayout\Model\Section\MenuSection;
use SBLayout\Model\Section\StaticSection;

$application = new Application(
    /* Title */
    "Simple test website",

    /* CSS stylesheets */
    array("default.css"),

    /* Sections */
    array(
        "header" => new StaticSection("header.php"),
        "menu" => new MenuSection(0),
        "contents" => new ContentsSection(true),
    ),

    /* Pages */
    new StaticContentPage("Home", new Contents("home.php"), array(
        "page1" => new StaticContentPage("Page 1", new Contents("page1.php")),
        "page2" => new StaticContentPage("Page 2", new Contents("page2.php")),
        "page3" => new StaticContentPage("Page 3", new Contents("page3.php"))
    ))
);

The above application model captures the following application layout properties:

  • The title of the web application is: "Simple test website" and displayed as part of the title of any sub page.
  • Every page references the same external CSS stylesheet file: default.css that is responsible for styling all pages.
  • Every page in the web application consists of the same kinds of sections:
    • The header element refers to a static header section whose purpose is to display a logo. This section is the same for every sub page.
    • The menu element refers to a MenuSection whose purpose is to display menu links to sub pages that can be reached from the entry page.
    • The contents element refers to a ContentsSection whose purpose is to display contents (text, images, tables, itemized lists etc.). The content is different for each selected page.
  • The application consists of a number of pages:
    • The entry page is a page called: 'Home' and can be reached by opening the root URL of the web application: http://localhost
    • The entry page refers to three sub pages: page1, page2 and page3 that can be reached from the entry page.

      The array keys refer to the path component in the URL that can be used as a selector to open the sub page. For example, http://localhost/page1 will open the page1 sub page and http://localhost/page2 will open the page2 sub page.

The currently selected page can be rendered with the following function invocation:

\SBLayout\View\HTML\displayRequestedPage($application);

By default, the above function generates a simple HTML page in which each section gets translated to an HTML div element:


The above screenshot shows what a page in the application could look like. The grey panel on top is the header that displays the logo, the blue bar is menu section (that displays links to sub pages that are reachable from the entry page), and the black area is the content section that displays the selected content.

One link in the menu section is marked as active to show the user which page in the page hierarchy (page1) has been selected.

Compound sections


Although the framework's functionality works quite well for most of my old use cases, I learned that in order to support flexbox layouts, I need to nest divs, which is something the default HTML code generator: displayRequestedPage() cannot do (as a sidenote: it is possible to create nestings by developing a custom generator).

For example, I may want to introduce another level of pages and add a submenu section to the layout, that is displayed on the left side of the screen.

To make it possible to position the menu bar on the left, I need to horizontally position the submenu and contents sections, while the remaining sections: header and menu must be vertically positioned. To make this possible with flexbox layouts, I need to nest the submenu and contents in a container div.

Since flexbox layouts have become so common nowadays, I have introduced a CompoundSection object, that acts as a generic container element.

With a CompoundSection, I can nest divs:

/* Sections */
array(
    "header" => new StaticSection("header.php"),
    "menu" => new MenuSection(0),
    "container" => new CompoundSection(array(
        "submenu" => new MenuSection(1),
        "contents" => new ContentsSection(true)
    ))
),

In the above code fragment, the container section will be rendered as a container div element containing two sub div elements: submenu and contents. I can use the nested divs structure to vertically and horizontally position the sections in the way that I described earlier.


The above screenshot shows the result of introducing a secondary page hierarchy and a submenu section (that has a red background).

By introducing a container element (through a CompoundSection) it has become possible to horizontally position the submenu next to the contents section.

Easier error handling


Another recurring issue is that most of my applications have to validate user input. When user input is incorrect, a page needs to be shown that displays an error message.

Previously, error handling and error page redirection was entirely the responsibility of the programmer -- it had to be implemented in every controller, which is quite a repetitive process.

In one of my test applications of the layout framework, I have created a page with a form that asks for the user's first and last name:


I wanted to change the example application to return an error message when any of these mandatory attributes were not provided.

To ease that burden, I have made framework's error handling mechanism more generic. Previously, the layout manager only took care of two kinds of errors: when an invalid sub page is requested, a PageNotFoundException is thrown redirecting the user to the 404 error page. When the accessibility criteria have not been met (e.g. a user is not authenticated) a PageForbiddenException is thrown directing the user to the 403 error page.

In the revised version of the layout framework, the PageNotFoundException and PageForbiddenException classes have become sub classes of the generic PageException class. This generic error class makes it possible for the error handler to redirect users to error pages for any HTTP status code.

Error pages should be added as sub pages to the entry page. The numeric keys should match the corresponding HTTP status codes:

/* Pages */
new StaticContentPage("Home", new Contents("home.php"), array(
    "400" => new HiddenStaticContentPage("Bad request", new Contents("error/400.php")),
    "403" => new HiddenStaticContentPage("Forbidden", new Contents("error/403.php")),
    "404" => new HiddenStaticContentPage("Page not found", new Contents("error/404.php"))
    ...
))
I have also introduced a BadRequestException class (that is also a sub class of PageException) that can be used for handling input validation errors.

PageExceptions can be thrown from controllers with a custom error message as a parameter. I can use the following controller implementation to check whether the first and last names were provided:

use SBLayout\Model\BadRequestException;

if($_SERVER["REQUEST_METHOD"] == "POST") // This is a POST request
{
    if(array_key_exists("firstname", $_POST) && $_POST["firstname"] != ""
        && array_key_exists("lastname", $_POST) && $_POST["lastname"] != "")
        $GLOBALS["fullname"] = $_POST["firstname"]." ".$_POST["lastname"];
    else
        throw new BadRequestException("This page requires a firstname and lastname parameter!");
}

The side effect is that if the user forgets to specify any of these mandatory attributes, he gets automatically redirected to the bad request error page:


This improved error handling mechanism significantly reduces the amount of boilerplate code that I need to write in applications that use my layout framework.

Using the iterator protocol for sub pages


As can be seen in the application model examples, some pages in the example applications have sub pages, such as the entry page.

In the layout framework, there are three kinds of pages that may provide sub pages:

  • A StaticContentPage object is a page that may refer to a fixed/static number of sub pages (as an array object).
  • A PageAlias object, that redirects the user to another sub page in the application, also offers the ability to refer users to a fixed/static number of sub pages (as an array object).
  • There is also a DynamicContentPage object in which a sub page can interpret the path component as a dynamic value. That dynamic value can, for example, be used as a parameter for a query that retrieves a record from a database.

In the old implementation of my framework, the code that renders the menu sections always has to treat these objects in a special way to render links to their available sub pages. As a result, I had to use the instanceof operator a lot, which is in a bad code smell.

I have changed the framework to use a different mechanism for stepping over sub pages: iterators or iterables (depending on the implementation language).

The generic Page class (that is the parent class of all page objects) provides a method called: subPageIterator() that returns an iterator/iterable that yields no elements. The StaticContentPage and PageAlias classes override this method to return an interator/iterable that steps over the elements in the array of sub pages.

Using iterators/iterables has a number of nice consequences -- I have eliminated two special cases and a bad code smell (the intensive use of instanceof), significantly improving the quality and readability of my code.

Another nice property is that it is also possible to override this method with a custom iterator, that for example, fetches sub page configurations from a database.

The pagemanager framework (another component in my web framework) offers a content management system giving end-users the ability to change the page structure and page contents. The configuration of the pages is stored in a database.

Although the pagemanager framework uses the layout framework for the construction of pages, it used to rely on custom code to render the menu sections.

By using the iterator protocol, it has become possible to re-use the menu section functionality from the layout framework eliminating the need for custom code. Moreover, it has also become much easier to integrate the pagemanager framework into an application because no additional configuration work is required.

I have also created a gallery application that makes it possible to expose the albums as items in the menu sections. Rendering the menu sections also used to rely on custom code, but thanks to using the iterator protocol that custom code was completely eliminated.

Flexible presentation of menu items


As I have already explained, an application layout can be divided into three kinds of sections. A StaticSection remains the same for any requested sub page, and a ContentSection is filled with content that is unique for the selected page.

In most of my use-cases, it is only required to have a single dynamic content section.

However, the framework is flexible enough to support multiple content sections as well. For example, the following screenshot shows the advanced example application (included with the web framework) in which both the header and the content sections change for each sub page:


The presentation of the third kind of section: MenuSection still used to remain pretty static -- they are rendered as div elements containing hyperlinks. The page that is currently selected is marked as active by using the active class property.

For most of my use-cases, just rendering hyperlinks suffices -- with CSS you can still present them in all kinds of interesting ways, e.g. by changing their colors, adding borders, and changing some its aspects when the user hovers with the mouse cursor over it.

In some rare cases, it may also be desired to present links to sub pages in a completely different way. For example, you may want to display an icon or add extra styling properties to an individual button.

To allow custom presentations of hyperlinks, I have added a new parameter: menuItem to the constructors of page objects. The menuItem parameter refers to a code snippet that decides how to render the link in a menu section:

new StaticContentPage("Icon", new Contents("icon.php"), "icon.php")

In the above example, the last parameter to the constructor, refers to an external file: menuitem/icon.php:

<span>
	<?php
	if($active)
	{
		?>
		<a class="active" href="<?= $url ?>">
			<img src="<?= $GLOBALS["baseURL"] ?>/image/menu/go-home.png" alt="Home icon">
			<strong><?= $subPage->title ?></strong>
		</a>
		<?php
	}
	else
	{
		?>
		<a href="<?= $url ?>">
			<img src="<?= $GLOBALS["baseURL"] ?>/image/menu/go-home.png" alt="Home icon">
			<?= $subPage->title ?>
		</a>
		<?php
	}
	?>
</span>

The above code fragment specifies how a link in the menu section should be displayed when the page is active or not active. We use the custom rendering code to display a home icon before showing the hyperlink.

In the advanced test application, I have added an example page in which every sub menu item is rendered in a custom way:


In the above screenshot, we should see two custom presented menu items in the submenu section on the left. The first has the home icon added and the second uses a custom style that deviates from the normal page style.

If no menuItem parameter was provided, the framework just renders a menu item as a normal hyperlink.

Other functionality


In addition to the new functionality explained earlier, I also made a number of nice small feature additions:


  • A function that displays bread crumbs (the route from the entry page to the currently opened page). The route is derived automatically from the requested URL and application model.
  • A function that displays a site map that shows the hierarchy of pages.
  • A function that makes it possible to embed a menu section in arbitrary sections of a page.

Conclusion


I am quite happy with the recent feature changes that I made to the layout framework. Although I have not done any web front-end development for quite some time, I had quite a bit of fun doing it.

In addition to the fact that useful new features were added, I have also simplified the codebase and improved its quality.

Availability


The Java, PHP and JavaScript implementations of my layout framework can be obtained from my GitHub page. Use them at your own risk!

Saturday, August 20, 2022

Porting a Duke3D map to Shadow Warrior


Almost six years ago, I wrote a blog post about Duke Nukem 3D, the underlying BUILD engine and my own total conversion that consists of 22 maps and a variety of interesting customizations.

Between 1997 and 2000, while I was still in middle school, I have spent a considerable amount of time developing my own maps and customizations, such as modified monsters. In the process, I learned a great deal about the technical details of the BUILD engine.

In addition to Duke Nukem 3D, the BUILD engine is also used as a basis for many additional games, such as Tekwar, Witchaven, Blood, and Shadow Warrior.

In my earlier blog post, I also briefly mentioned that in addition to the 22 maps that I created for Duke Nukem 3D, I have also developed one map for Shadow Warrior.

Last year, in my summer holiday, that was still mostly about improvising my spare time because of the COVID-19 pandemic, I did many interesting retro-computing things, such as fixing my old computers. I also played a bit with some of my old BUILD engine game experiments, after many years of inactivity.

I discovered an interesting Shadow Warrior map that attempts to convert the E1L2 map from Duke Nukem 3D. Since both games use the BUILD engine with mostly the same features (Shadow Warrior uses a slightly more advanced version of the BUILD engine), this map inspired me to also port one of my own Duke Nukem 3D maps, as an interesting deep dive to compare both game's internal concepts.

Although most of the BUILD engine and editor concepts are the same in both games, their game mechanics are totally different. As a consequence, the porting process turned out to be very challenging.

Another reason that it took me a while to complete the project is because I had to put it on hold in several occasions due to all kinds obligations. Fortunately, I have managed to finally finish it.

In this blog post, I will describe some of the things that both games have in common and the differences that I had to overcome in the porting process.

BUILD engine concepts


As explained in my previous blog post, the BUILD-engine is considered a 2.5D engine, not a true 3D engine due to the fact that it had to cope with all kinds of technical limitations of home computers commonly used at that time.

In fact, most of the BUILD-engine concepts are two-dimensional -- maps are made out two-dimensional surfaces called sectors:


The above picture shows a 2-dimensional top-level view of my ported Shadow Warrior map. Sectors are two dimensional areas surrounded by walls -- the white lines denote solid walls and red lines the walls between adjacent sectors. Red walls are invisible in 3D mode.

The purple and cyan colored objects are sprites (objects that typically provide some form of interactivity with the player, such as monsters, weapons, items or switches). The "sticks" that are attached to the sprites indicate in which direction the sprite is facing. When a sprite is purple, it will block the player. Cyan colored sprites allow a player to move through it.

You can switch between 2D and 3D mode in the editor by pressing the Enter-key on the numeric key pad.

In 3D mode, each sector's ceiling and floor can be given its own height, and we can configure textures for the walls, floors and ceilings (by pointing to any of these objects and pressing the 'V' key) giving the player the illusion to walk around in a 3D world:


In the above screenshot, we can see the corresponding 3D view of the 2D grid shown earlier. It consists of an outdoor area, grass, a lane, and the interior of the building. Each of these areas are separate 2D sectors with their own custom floor and ceiling heights, and their own textures.

The BUILD engine has all kinds of limitations. Although a world may appear to be (somewhat) 3-dimensional, it is not possible to stack multiple sectors on top of each other and simultaneously see them in 3D mode, although there are some tricks to cope with that limitation.

(As a sidenote: Shadow Warrior has a hacky feature that makes it possible for a player to observe multiple rooms stacked on top of each other, by using specialized wall/ceiling textures, special purpose sprites and a certain positioning of the sectors themselves. Sectors in the map are still separated, but thanks to the hack they can be visualized in such a way that they appear to be stacked on top of each other).

Moreover, the BUILD engine can also not change the perspective when a player looks up or down, although there is the possibility to give a player that illusion by stretching the walls. (As a sidenote: modern source ports of the BUILD engine have been adjusted to use Polymost, an OpenGL rendering extension, which actually makes it possible to provide a true 3D look).

Monsters, weapons, items, and most breakable/movable objects are sprites. Sprites are not really "true 3D" objects. Normally, sprites will always face the player from the same side, regardless of the position or the perspective of the player:

As can be seen, the guardian sprite always faces the player from the front, regardless of the angle of the camera.

Sprites can also be flattened and rotated, if desired. Then they will appear as a flat surface to the player:


For example, the wall posters in the screenshot above are flattened and rotated sprites.

Shadow warrior uses a slightly upgraded BUILD engine that can provide a true 3D experience for certain objects (such as weapons, items, buttons and switches) by displaying them as voxels (3D pixels):


The BUILD engine that comes with Duke Nukem 3D lacks the ability to display voxels.

Porting my Duke Nukem 3D map to Shadow Warrior


The map format that Duke Nukem 3D and Shadow Warrior use are exactly the same. To be precise: they both use version 7 of the map format.

At first, it seemed to look relatively straight forward to port a map from one game to another.

The first step in my porting process was to simply make a copy of the Duke Nukem 3D map and open it in the Shadow Warrior BUILD editor. What I immediately noticed is that all the textures and sprites look weird. The textures still have the same indexes and refer to textures in the Shadow Warrior catalog that are completely different:


Quite a bit of my time was spent on fixing all textures and sprites by looking for suitable replacements. I ended up replacing textures for the rocks, sky, buildings, water, etc. I also had to replace the monsters, weapons, items and other dynamic objects, and overcome some limitations for the player in the map, such as the absence of a jet pack. The process was a labourious, but straight forward.

For example, this is how I have fixed the beach area:


I have changed the interior of the office building as follows:


And the back garden as follows:


The nice thing about the garden area is that Shadow Warrior has a more diverse set of vegetation sprites. Duke Nukem 3D only has palm trees.

Game engine differences


The biggest challenge for me was porting the interactive parts of the game. As explained earlier, game mechanics are not implemented by the engine or the editor. BUILD-engine games are separated into an engine and game part in which only the former component is generalized.

This diagram (that I borrowed from a Duke Nukem 3D code review article written by Fabien Sanglard) describes the high-level architecture of Duke Nukem 3D:


In the above diagram, the BUILD engine (on the right) is general purpose component developed by Ken Silverman (the author of the BUILD engine and editor) and shipped as a header and object code file to 3D Realms. 3D Realms combines the engine with the game artifacts on the left to construct a game executable (DUKE3D.EXE).

To configure game effects in the BUILD editor, you need to annotate objects (walls, sprites and sectors) with tags and add special purpose sprites to the map. To the editor these objects are just meta-data, but the game engine treats them as parameters to create special effects.

Every object in a map can be annotated with meta data properties called Lotags and Hitags storing a 16-bit numeric value (by using the Alt+T and Alt+H key combinations in 2D mode).

In Shadow Warrior, the tag system was extended even further -- in addition to Lotags and Hitags, objects can potentially have 15 numerical tags (TAG1 corresponds to the Hitag, and TAG2 to the Lotag) and 11 boolean tags (BOOL1-BOOL11). In 2D mode, these can be configured with the ' and ; keys in combination with a numeric key (0-9).

We can also use special purpose sprites that are visible in the editor, but hidden in the game:


In the above screenshot of my Shadow Warrior map, there are multiple special purpose sprites visible: the ST1 sprites (that can be used to control all kinds of effects, such as moving a door). ST1 sprites are visible in the editor, but not in the game.

Although both games use the same principles for configuring game effects, their game mechanics are completely different.

In the next sections, I will show all the relevant game effects in my Duke Nukem 3D map and explain how I translated them to Shadow Warrior.

Differences in conventions


As explained earlier, both games frequently use Lotags and Hitags to create effects.

In Duke Nukem 3D, a Lotag value typically determines the kind of effect, while an Hitag value is used as a match tag to group certain events together. For example, multiple doors can be triggered by the same switch by using the same match tag.

Shadow Warrior uses the opposite convention -- a Hitag value typically determines the effect, while a Lotag value is often used as a match tag.


Furthermore, in Duke Nukem 3D there are many kinds of special purpose sprites, as shown in the screenshot above. The S-symbol sprite is called a Sector Effector that determines the kind of effect that a sector has, the M-symbol is a MUSIC&SFX sprite used to configure a sound for a certain event, and a GPSPEED sprite determines the speed of an effect.

Shadow Warrior has fewer special purpose sprites. In almost all cases, we end up using the ST1 sprite (with index 2307) for the configuration of an effect.

ST1 sprites typically combine multiple interactivity properties. For example, to make a sector a door, that opens slowly, produces a sound effect and that closes automatically, we need to use three Sector Effector sprites and one GPSPEED sprite in Duke Nukem 3D. In Shadow Warrior, the same is accomplished by only using two ST1 sprites.

The fact that the upgraded BUILD engine in Shadow Warrior makes it possible to change more than two numerical tags (and boolean values), makes it possible to combine several kinds of functionality into one sprite.

Co-op respawn points


To make it possible to play a multiplayer cooperative game, you need to add co-op respawn points to your map. In Duke Nukem 3D, this can be done by adding seven sprites with texture 1405 and setting the Lotag value of the sprites to 1. Furthermore, the player's respawn point is also automatically a co-op respawn point.

In Shadow Warrior, co-op respawn points can be configured by adding ST1 sprites with Hitag 48. You need eight of them, because the player's starting point is not a co-op start point. Each respawn point requires a unique Lotag value (a value between 0 and 7).

Duke match/Wang Bang respawn points


For the other multiplayer game mode: Duke match/Wang Bang, we also need re-spawn points. In both games the process is similar to their co-op counterparts -- in Duke Nukem 3D, you need to add seven sprites with texture 1405, and set the Lotag value to 0. Moreover, the player's respawn point is also a Duke Match respawn point.

In Shadow Warrior, we need to use ST1 sprites with a Hitag value of 42. You need eight of them and give each of them a unique Lotag value between 0-7 -- the player's respawn point is not a Wang Bang respawn point.

Underwater areas


As explained earlier, the BUILD engine makes it possible to have overlapping sectors, but they cannot be observed simultaneously in 3D mode -- as such, it is not possible to natively provide a room over room experience, although there are some tricks to cope with that limitation.

In both games it is possible to dive into the water and swim in underwater areas, giving the player some form of a room over room experience. The trick is that the BUILD engine does not render both sectors. When you dive into the water or surface again, you get teleported from one sector to another sector in the map.


Although both games use a similar kind of teleportation concept for underwater areas, they are configured in a slightly different way.

In both games, you need the ability to sink into the water in the upper area. In Duke Nukem 3D, the player automatically sinks by giving the sector a Lotag value of 1. In Shadow Warrior, you need to add a ST1 sprite with a Hitag value of 0, and a Lotag value that determines how much the player will sink. 40 is typically a good value for water areas.

The underwater sector in Duke Nukem 3D needs a Lotag value of 2. In the game, the player will automatically swim when it enters the sector and the colors will be turned blue-ish.

We also need to determine from what position in a sector a player will teleport. Both the upper and lower sector should have the same 2 dimensional shape. In Duke Nukem 3D, teleportation can be specified by two Sector Effector sprites having a Lotag 7. These sprites need to be exactly in the same position in the upper and lower sectors. The Hitag value (match tag) needs to be the same:


In the screenshot above, we should see a 2D grid with two Sector Effector sprites having a Lotag of 7 (teleporter) and unique match tags (110 and 111). Both the upper and underwater sectors have exactly the same 2-dimensional shape.

In Shadow Warrior, teleportation is also controlled by sprites that should be in exactly the same position in the upper and lower sectors.

In the upper area, we need an ST1 sprite with a Hitag value of 7 and a unique Lotag value. In the underwater area, we need an ST1 sprite with an Hitag value of 8 and the same match Lotag. The latter ST1 sprite (with Hitag 8) automatically lets the player swim. If the player is an under water area where he can not surface, the match Lotag value should be 0.

In Duke Nukem 3D the landscape will automatically look blue-ish in an underwater area. To make the landscape look blue-ish in Shadow Warrior, we need to adjust the palette of the walls, floors and ceilings from 0 to 9.


Garage doors


In my map, I commonly use garage/DOOM-style doors that move up when you touch them.


In Duke Nukem 3D, we can turn a sector into a garage door by giving it a Lotag value of 20 and lowering the ceiling in such a way that it touches the floor. By default, opening a door does not produce any sound. Moreover, a door will not close automatically.

We can adjust that behaviour by placing two special purpose sprites in the door sector:

  • By adding a MUSIC&SFX sprite we can play a sound. The Lotag value indicates the sound number. 166 is typically a good sound.
  • To automatically close the door after a certain time interval, we need to add a Sector Effector sprite with Lotag 10. The Hitag indicates the time interval. For many doors, 100 is a good value.


In the above screenshot, we can see what the garage door looks like if I slightly move the ceiling up (normally the ceiling should touch the floor). There is both a MUSIC&SFX (to give it a sound effect) as well as a Sector Effector sprite (to ensure that the door gets closed automatically) in the door sector.

In Shadow Warrior, we can accomplish the same thing by adding an ST1 sprite to the door sector with Hitag 92 (Vator). A vator is a multifunctional concept that can be used to move sectors up and down in all kinds of interesting ways.

An auto closing garage door can be configured by giving the ST1 sprite the following tag and boolean values:

  • TAG2 (Lotag). Is a match that that should refer to a unique numeric value
  • TAG3 specifies the type of vator. 0 indicates that it is operated manually or by a switch/trigger
  • TAG4 (angle) specifies the speed of the vator. 350 is a reasonable value.
  • TAG9 specifies the auto return time. 35 is a reasonable value.
  • BOOL1 specifies whether the door should be opened by default. Setting it to 1 (true) allows us to keep the door open in the editor, rather than moving the ceiling down so that it touches the floor.
  • BOOL3 specifies whether the door could crush the player. We set it to 1 to prevent this from happening.

By default, a vator moves a sector down on first use. To make the door move up, we must rotate the ST1 sprite twice in 3D mode (by pressing the F key twice).

We can configure a sound effect by placing another ST1 sprite near the door sector with a Hitag value of 134. We can use TAG4 (angle) to specify the sound number. 473 is a good value for many doors.


In the above screenshot, we should see what a garage door looks like in Shadow Warrior. The rotated ST1 sprite defines the Vator whereas the regular ST1 provides the sound effect.

Lifts


Another prominent feature of my Duke Nukem 3D map are lifts that allow the player to reach the top or roofs of the buildings.


In Duke Nukem 3D, lift mechanics are a fairly concept -- we should give a sector a Lotag value of 17 and the sector will automatically move up or down when the player presses the use key while standing in the sector. The Hitag of a MUSIC&SFX sprite determines the stop sound and a Lotag value the start sound.

In Shadow Warrior, there is no direct equivalent of the same lift concept, but we can create a switch-operated lift by using the Vator concept (the same ST1 sprite with Hitag 92 used for garage doors) with the following properties:

  • TAG2 (Lotag) should refer to a unique match tag value. The switches should use the exact same value.
  • TAG3 determines the type of vator. 1 is used to indicate that it can only be operated by switches.
  • TAG4 (Angle) determines the speed of the vator. 325 is a reasonable value.

We have to move the ST1 sprite to the same height where the lift should arrive after it was moved up.

Since it is not possible to respond to the use key while the player is standing in the sector, we have to add switches to control the lift. A possible switch is sprite number 575. The Hitag should match the Lotag value of the ST1 sprite. The switch sprite should have a Lotag value of 206 to indicate that it controls a Vator.


The above screenshot shows the result of my porting effort -- switches have been added, the MUSIC&SFX sprite was replaced by an equivalent ST1 sprite. The ST1 sprite that controls the movement is not visible because it was moved up to the same height as the adjacent upper floor.

Swinging doors


In addition to garage doors, my level also contains a number of swinging doors.

In Duke Nukem 3D, a sector can be turned into a swinging door by giving it a Lotag of 23 and moving the floor up a bit. We also need to add a Sector Effector with Lotag 11 and a unique Hitag value that acts as the door's pivot.

As with garage doors, they will not produce any sound effects or close automatically by default, unless we add a MUSIC&SFX and a Sector Effector sprite (with Lotag 10) to the door sector.


In Shadow Warrior, the rotating door concept is almost the same. We need to add an ST1 sprite with Hitag 144 and a unique Lotag value to the sector that acts as the door's pivot.

In addition, we need to add an ST1 sprite to the sector that configures a rotator:

  • TAG2/Lotag determines a unique match tag value that should be identical to the door's pivot ST1 sprite.
  • TAG3 determines the type of rotator. 0 indicates that it can be manually triggered or by a switch.
  • TAG5 determines the angle move amount. 512 specifies that it should move 90 degrees to the right. -512 is moving the door 90 degrees to the left.
  • TAG7 specifies the angle increment. 50 is a good value.
  • TAG9 specifies the auto return time. 35 is a good value.

As with garage doors, we also need to add an ST1 sprite (with Hitag 134) to produce a sound. TAG4 (the angle) can be used to specify the sound number. 170 is a good value for rotating doors.


Secret places


My map also has a number of secret places (please do not tell anyone :-) ). In Duke Nukem 3D, any sector that has a Lotag value of 32767 is considered a secret place. In Shadow Warrior the idea is the same -- any sector with a Lotag of 217 is considered a secret place.

Puzzle switches


Some Duke Nukem 3D maps also have so-called puzzle switches requiring the player to find the correct on-and-off combination to unlock something. In my map they are scattered all over the level to unlock the final key. The E2L1 map in Duke Nukem 3D shows a better example:


We can use the Hitag value to determine whether the switch needs to be switched off (0) or on (1). We can use the Lotag as a match tag to group multiple switches.

In Shadow Warrior, each switch uses a Hitag as a match tag and a Lotag value to configure the switch type. Giving a switch a Lotag value of 213 makes it a combo switch. TAG3 can be used set to 0 to indicate that it needs to be turned off and 1 that it needs to be turned on.

Skill settings


Both games have four skill levels. The idea is that the higher the skill level is, the more monsters you will have to face.

In Duke Nukem 3D you can specify the minimum skill level of a monster by giving the sprite a Lotag value that corresponds to the minimum skill level. For example, giving a monster a Lotag value of 2 means that it will only show up when the skill level is two or higher (Skill level 2 corresponds to: Let's rock). 0 (the default value) means that it will show up in any skill level:


In Shadow Warrior, each sprite has its own dedicated skill attribute that can be set by using the key combination ' + K. The skill level is displayed as one of the sprite's attributes.


In the above screenshot, the sprite on the left has a S:0 prefix meaning that it will be visible in skill level 0 or higher. The sprite on the right (with a prefix: S:2) appears from skill level 2 or higher.

End switch


In both games, you typically complete a level by touching a so-called end switch. In Duke Nukem 3D an ending switch can be created by using sprite 142 and giving it a Lotag of 65535. In Shadow Warrior the idea is the same -- we can create an end switch by using sprite 2470 and giving it a Lotag of 116.


Conclusion


In this blog post, I have described the porting process of a Duke Nukem 3D map to Shadow Warrior and explained some of the properties that are common and different in both games.

Although this project was a pretty useless project (the game is quite old, from the late 90s), I had a lot of fun doing it after not having touched this kind of technology for over a decade. I am quite happy with the result:


Despite the fact that this technology is old, I am still quite surprised to see how many maps and customizations are still being developed for these ancient games. I think this can be attributed to the fact that these engines and game mechanics are highly customizable and still relatively simple to use due to the technical limitations at the time they were developed.

Since I did most of my mapping/customization work many years before I started this blog, I thought that sharing my current experiences can be useful for others who intend to look at these games and creating their own customizations.

Wednesday, April 20, 2022

In memoriam: Eelco Visser (1966-2022)

On Tuesday 5 April 2022 I received the unfortunate news that my former master's and PhD thesis supervisor: Eelco Visser has unexpectedly passed away.

Although I made my transition from academia to industry almost 10 years ago and I have not been actively doing academic research anymore (I published my last paper in 2014, almost two years after completing my PhD), I have always remained (somewhat) connected to the research world and the work carried out by my former supervisor, who started his own programming languages research group in 2013.

He was very instrumental in the domain-specific programming languages research domain, but also in the software deployment research domain, a very essential part in almost any software development process.

Without him and his ideas, his former PhD student: Eelco Dolstra would probably never have started the work that resulted in the Nix package manager. As a consequence, my research on software deployment (resulting in Disnix and many other Nix-related tools and articles) and this blog would also not exist.

In this blog post, I will share some memories of my time working with Eelco Visser.

How it all started


The first time I met Eelco was in 2007 when I was still a MSc student. I just completed the first year of the TU Delft master's programme and I was looking for an assignment for my master's thesis.

Earlier that year, I was introduced to a concept called model-driven development (also ambiguously called model-driven engineering/architecture, the right terminology is open to interpretation) in a guest lecture by Jos Warmer in the software architecture course.

Modeling software systems and automatically generating code (as much as possible), was one of the aspects that really fascinated me. Back then, I was already convinced that working from a higher abstraction level, with more "accessible" building blocks could be quite useful to hide complexity, reduce the chances on errors and make developers more productive.

In my first conversation with Eelco, he asked me why I was looking for a model-driven development assignment and he asked me various questions about my past experience.

I told him about my experiences with Jos Warmer's lecture. Although he seemed to understand my enthusiasm, he also explained me that his work was mostly about creating textual languages, not visual languages such as UML profiles, that are commonly used in MDA development processes.

He also specifically asked me about the compiler construction course (also part of the master's programme), that is required for essential basic knowledge about textual languages.

The compiler construction course (as it was taught in 2007) was considered to be very complex by many students, in particular the practical assignment. As a practical assignment, you had to rewrite the a parser from using GNU Bison (a LARL(1) parser) to LLnextgen (a LL(1) parser) and extend the reference compiler with additional object-oriented programming features. Moreover, the compiler was implemented in C, and relied on advanced concepts, such as function pointers and proper alignment of members in a struct.

I explained Eelco that despite the negative image of the course because of its complexity, I actually liked it very much. Already at a young age I had the idea to develop my own programming language, but I had no idea how to do it, but when I was exposed to all these tools and concepts I finally learned about all the missing bits and pieces.

I was also trying to convince him that I am always motivated to deep dive into technical details. As an example, I explained him that one of my personal projects is creating customized Linux distributions by following the Linux from Scratch book. Manually following all the instructions in the book is time consuming and difficult to repeat. To make deploying a customized Linux distribution doable, I developed my own automated solution.

After elaborating about my (somewhat crazy) personal project, he told me that there is an ongoing research project that I will probably like very much. A former PhD student of his: Eelco Dolstra developed the Nix package manager and this package manager was used as the foundation for an entire Linux distribution: NixOS.

He gave me a printed copy of Eelco Dolstra's thesis and convinced me that I should give NixOS a try.

Research assignment


After reading Eelco Dolstra's PhD thesis and trying out NixOS (that was much more primitive in terms of features compared to today's version), Eelco Visser gave me my first research assignment.

When he joined Delft University of Technology in 2006 (a year before I met him) as an associate professor, he started working on a new project called: WebDSL. Previously, most of his work was focused on the development of various kinds meta-tools for creating domain specific languages, such as:

  • SDF2 is a formalism used to write a lexical and context free syntax. It has many interesting features, such as a module system and scannerless parsing, making it possible to embed a guest language in an host language (that may share the same keywords). SDF2 was originally developed by Eelco Visser for his PhD thesis for the ASF+SDF Meta Environment.
  • ATerm library. A library that implements the annotated terms format to exchange structured data between tools. SDF2 uses it to encode parse/abstract syntax trees.
  • Stratego/XT. A language and toolset for program transformation.

WebDSL was a new step for him, because it is an application language (built with the above tools) rather than a meta language.

With WebDSL, in addition to just building an application language, he also had all kinds of interesting ideas about web application development and how to improve it, such as:

  • Reducing/eliminating boilerplate code. Originally WebDSL was implemented with JBoss and the Seam framework using Java as an implementation language, requiring you to write a lot of boilerplate code, such as getters/setters, deployment descriptors etc.

    WebDSL is declarative in the sense that you could more concisely describe what you want in a rich web application: a data model, and pages that should render content and data.
  • Improving static consistency checking. Java (the implementation language used for the web applications) is statically typed, but not every concern of a web application can be statically checked. For example, for interacting with a database, embedded SQL queries (in strings) are often not checked. In JSF templates, page references are not checked.

    With WebDSL all these concerns are checked before the deployment of an web application.

By the time I joined, he already assembled several PhD and master's students to work on a variety of aspects of WebDSL and the underlying tooling, such as Stratego/XT.

Obviously, in a development process of a WebDSL application, like any application, you will also eventually face a deployment problem -- you need to perform activities to make the application available for use.

For solving deployment problems in our department, Nix was already quite intensively used. For example, we had a Nix-based continuous integration service called the Nix buildfarm (several years later, its implementation was re-branded into Hydra), that built all bleeding edge versions of WebDSL, Stratego/XT and all other relevant packages. The Nix package manager was used by all kinds of people in the department to install bleeding edge versions of these tools.

My research project was to automate the deployment of WebDSL applications using tooling from the Nix project. In my first few months, I have packaged all the infrastructure components that a WebDSL application requires in NixOS (JBoss, MySQL and later Apache Tomcat). I changed WebDSL to use GNU Autotools as build infrastructure (which was a common practice for all Stratego/XT related projects at that time) and made subtle modifications to prevent unnecessary recompilations of WebDSL applications (such as making the root folder dynamically configurable) and wrote an abstraction function to automatically build WAR files.

Thanks to Eelco I ended up in a really friendly and collaborative atmosphere. I came in touch with his fellow PhD and master's students and we frequently had very good discussions and collaborations.

Eelco was also quite helpful in the early stages of my research. For example, whenever I was stuck with a challenge he was always quite helpful in discussing the underlying problem and bringing me in touch with people that could help me.

My master's thesis project


After completing my initial version of the WebDSL deployment tool, that got me familiarised with the basics of Nix and NixOS, I started working on my master's thesis which was a collaboration project between Delft University of Technology and Philips Research.

Thanks to Eelco I came in contact with a former master's thesis student and postdoc of his: Merijn de Jonge who was employed by Philips Research. He was an early contributor to the Nix project and collaborated on the first two research papers about Nix.

While working on my master's thesis I developed the first prototype version of Disnix.

During my master's thesis project, Eelco Dolstra, who was formerly a postdoc at Utrecht University joined our research group in Delft. Eelco Visser made sure that I got all the help from Eelco Dolstra about all technical questions about Nix.

Becoming a PhD student


My master's thesis project was a pilot for a bigger research project. Eelco Visser, Eelco Dolstra and Merijn de Jonge (I was already working quite intensively with them for my master's thesis) were working on a research project proposal. When the proposal got accepted by NWO/Jacquard for funding, Eelco Visser was the first to inform me about the project to ask me what I thought about it.

At that moment, I was quite surprised to even consider doing a PhD. A year before, I attended somebody's else's PhD defence (someone who I really considered smart and talented) and thought that doing such a thing myself was way out of my grasp.

I also felt a bit like an impostor because I had interesting ideas about deployment, but I was still in the process of finishing up/proving some of my points.

Fortunately, thanks to Eelco my attitude completely changed in that year -- during my master's thesis project he convinced me that the work I was doing is relevant. What I also liked is the attitude in our group to actively build tools, have the time and space to explore things, and eat our own dogfood with it to solve relevant practical problems. Moreover, much of the work we did was also publicly available as free and open source software.

As a result, I easily grew accustomed to the research process and the group's atmosphere and it did not take long to make the decision to do a PhD.

My PhD


Although Eelco Visser only co-authored one of my published papers, he was heavily involved in many aspects of my PhD. There are way too many things to talk about, but there are some nice anecdotes that I really find worth sharing.

OOPSLA 2008


I still remember the first research conference that I attended: OOPSLA 2008. I had a very quick publication start, with a paper covering an important aspect of master's thesis: the upgrade aspect for distributed systems. I had to present my work at HotSWUp, an event co-located with OOPSLA 2008.

(As a sidenote: because we had to put all our efforts in making the deadline, I had to postpone the completion of my master's thesis a bit, so it started overlap with my PhD).

It was quite an interesting experience, because in addition to the fact that it was my first conference, it was also my first time to travel to the United States and to step into an airplane.

The trip was basically a group outing -- I was joined by Eelco and many of his PhD students. In addition to my HotSWUp 2008 paper, we also had an OOPSLA paper (about the Dryad compiler), a WebDSL poster, and another paper about the implementation of WebDSL (the paper titled: "When frameworks let you down") to present.

I was surprised to see how many people Eelco knew at the conference. He was also actively encouraging us to meet up with people and bringing us in touch with people that he know that could be relevant.

We were having a good time together, but I also remember him saying that it is actually much better to visit a conference alone, rather than in a group. Being alone makes it much easier and more encouraging to meet new people. That lesson stuck and in many future events, I took the advantage of being alone as an opportunity to meet up.

Working on practical things


Once in a while I had casual discussions with him about ongoing things in my daily work. For my second paper, I had to travel to ICSE 2009 in Vancouver, Canada all by myself (there were some colleagues traveling to co-located events, but took different flights).

Despite the fact that I was doing research on Nix-related things, NixOS at that time was not my main operating system yet on my laptop because it was missing features that I consider a must-have in a Linux distribution.

In the weeks before the planned travel date, I was intensively working on getting all the software packaged that I consider important. One major packaging effort was getting KDE 4.2 to work, because I was dissatisfied with only having the KDE 3.5 base package available in NixOS. VirtualBox was another package that I consider critical, so that I could still run a conventional Linux distribution and Microsoft Windows.

Nothing about this work is considered scientific "research" that may result in a paper that we can publish. Nonetheless, Eelco recognized the value of making NixOS more usable and encouraged me to get all that software packaged. He even asked me: "Are you sure that you have packaged enough software in NixOS so that you can survive that week?"

Starting my blog


Another particularly helpful advice that he gave me is that I should start a blog. Although I had a very good start of my PhD, having a paper accepted in my first month and another several months later, I slowly ran into numerous paper rejections, with reviews that were not helpful at all.

I talked to him about my frustrations and explained that software deployment research is generally a neglected subject. There is no research-related conference that is specifically about software deployment (there used to be a working conference on component deployment, but by the time I became a PhD student it was no longer organized), so we always had to "package" our ideas into subjects for different kinds of conferences.

He gave me the advice to start a blog to increase my interaction with the research community. As a matter of fact, many people in our research group, including Eelco, had their own blogs.

It took me some time to take that step. First, I had to "catch up" on my blog with relevant background materials. Eventually, it paid off -- I wrote a blog post titled: Software deployment complexity to emphasize software deployment as an important research subject, and thanks to Eelco's Twitter network I came in touch with all kinds of people.

Lifecycle management


For most of my publication work, I intensively worked with Eelco Dolstra. Eelco Visser left most of the practical supervision to him. The only published paper that we co-authored was: "Software Deployment in a Dynamic Cloud: From Device to Service Orientation in a Hospital Environment".

There was also a WebDSL-related subject that we intensively worked on for a while, that unfortunately never fully materialized.

Although I had already had the static aspects of a WebDSL application deployment automated -- the infrastructure components (Apache Tomcat, MySQL) as well as a function to compile a Java Web application Archive (WAR) with the WebDSL compiler, we also had to cope with the data that a WebDSL application stores -- WebDSL data models can evolve, and when this happens, the data needs to be migrated from an old to a new table structure.

Sander Vermolen, a colleague of mine, worked on a solution to make automated data migrations of WebDSL possible.

At some point, we came up with the idea to make this all work together -- deployment automation and data migration from a high-level point of view hiding unimportant implementation details. Due to the lack of a better name we called this solution: "lifecycle management".

Although the project seemed to look straight forward to me in the beginning, I (and probably all of us) heavily underestimated how complex it was to bring Nix's functional deployment properties to data management.

For example, Nix makes it possible to store multiple variants of the same packages (e.g. old and new versions) simultaneously on a machine without conflicts and makes it possible to cheaply switch between versions. Databases, on the other hand, make imperative modifications. We could manage multiple versions of a database by making snapshots, but doing this atomically and in an portable way is very expensive, in particular when databases are big.

Fortunately, the project was not a complete failure. I have managed to publish a paper about a sub set of the problem (automatic data migrations when databases move from one machine to another and a snapshotting plugin system), but the entire solution was never fully implemented.

During my PhD defence he asked me a couple of questions about this subject, from which (of course!) I understood that it was a bummer that we never fully realized the vision that we initially came up with.

Retrospectively, we should have divided the problem into a smaller chunks and solve each problem one by one, rather than working on the entire integration right from the start. The integrated solution would probably still consist of many trade-offs, but it still would have been interesting to have come up with at least a solution.

PhD thesis


When I was about to write my PhD thesis, I was making the bold decision to not compose the chapters directly out of papers, but to write a coherent story using my papers as ingredients, similar to Eelco Dolstra's thesis. Although there are plenty of reasons to think of to not do such a thing (e.g. it takes much more time for a reading committee to review such a thesis), he was actually quite supportive in doing that.

On the other hand, I was not completely surprised by it, considering the fact that his PhD thesis was several orders of magnitude bigger than mine (over 380 pages!).

Spoofax


After I completed my PhD, and made my transition to industry, he and his research group relentlessly kept working on the solution ecosystem that I just described.

Already during my PhD, many improvements and additions were developed that resulted in the Spoofax language workbench, an Eclipse plugin in which all these technologies come together to make the construction of Domain Specific Languages as convenient as possible. For a (somewhat :-) ) brief history of the Spoofax language workbench I recommend you to read this blog post written by him.

Moreover, he also kept dogfooding his own practical problems. During my PhD, three serious applications were created with WebDSL: researchr (a social network for researchers sharing publications), Yellowgrass (an issue tracker) and Weblab (a system to facilitate programming exams). These applications are still maintained and used by the university as of today.

A couple of months after my PhD defence in 2013 (I had to wait for several months to get feedback and a date for my defence), he was awarded the prestigious Vici grant and became a full professor, starting his own programming language research group.

In 2014, when I was already in industry for two years, I was invited for his inauguration ceremony and was given another demonstration of what Spoofax has become. I was really impressed by all the new meta languages that were developed and what Spoofax looked like. For example, SDF2 evolved into SDF3, a new meta-language for developing Name Address bindings (NaBL) was developed etc.

Moreover, I liked his inauguration speech very much, in which he briefly demonstrated the complexities of computers and programming, and what value domain specific languages can provide.

Concluding remarks


In this blog post, I have written down some of my memories working with Eelco Visser. I did this in the spirit of my blog, whose original purpose was to augment my research papers with practical information and other research aspects that you normally never read about.

I am grateful for the five years that we worked together, that he gave me the opportunity to do a PhD with him, for all the support, the things he learned me, and the people who he brought me in touch with. People that I still consider friends as of today.

My thoughts are with his family, friends, the research community and the entire programming languages group (students, PhD students, Postdocs, and other staff).